OpenAPI
Expose an OpenAPI server on the Agent Gateway.
Configure the Agent Gateway
-
Download the OpenAPI schema for the Petstore app.
curl -o openapi.json https://raw.githubusercontent.com/agentgateway/agentgateway/refs/heads/main/examples/openapi/openapi.json -
Create a listener and target configuration for your Agent Gateway. In this example, the Agent Gateway is configured as follows:
- Listener: An SSE listener is configured and exposed on port 3000.
- Target: The Agent Gateway connects to a Swagger UI endpoint that exposes the OpenAPI spec for the Petstore sample app. You also include the OpenAPI schema that you downloaded earlier.
cat <<EOF > config.json { "type": "static", "listeners": [ { "name": "sse", "protocol": "MCP", "sse": { "address": "[::]", "port": 3000 } } ], "targets": { "mcp": [ { "name": "petstore", "openapi": { "host": "petstore3.swagger.io", "port": 443, "schema": { "file_path": "./openapi.json" } } } ] } } EOF -
Run the Agent Gateway.
agentgateway -f config.json
Verify access to the Petstore APIs
-
Open the Agent Gateway UI to view your listener and target configuration.
-
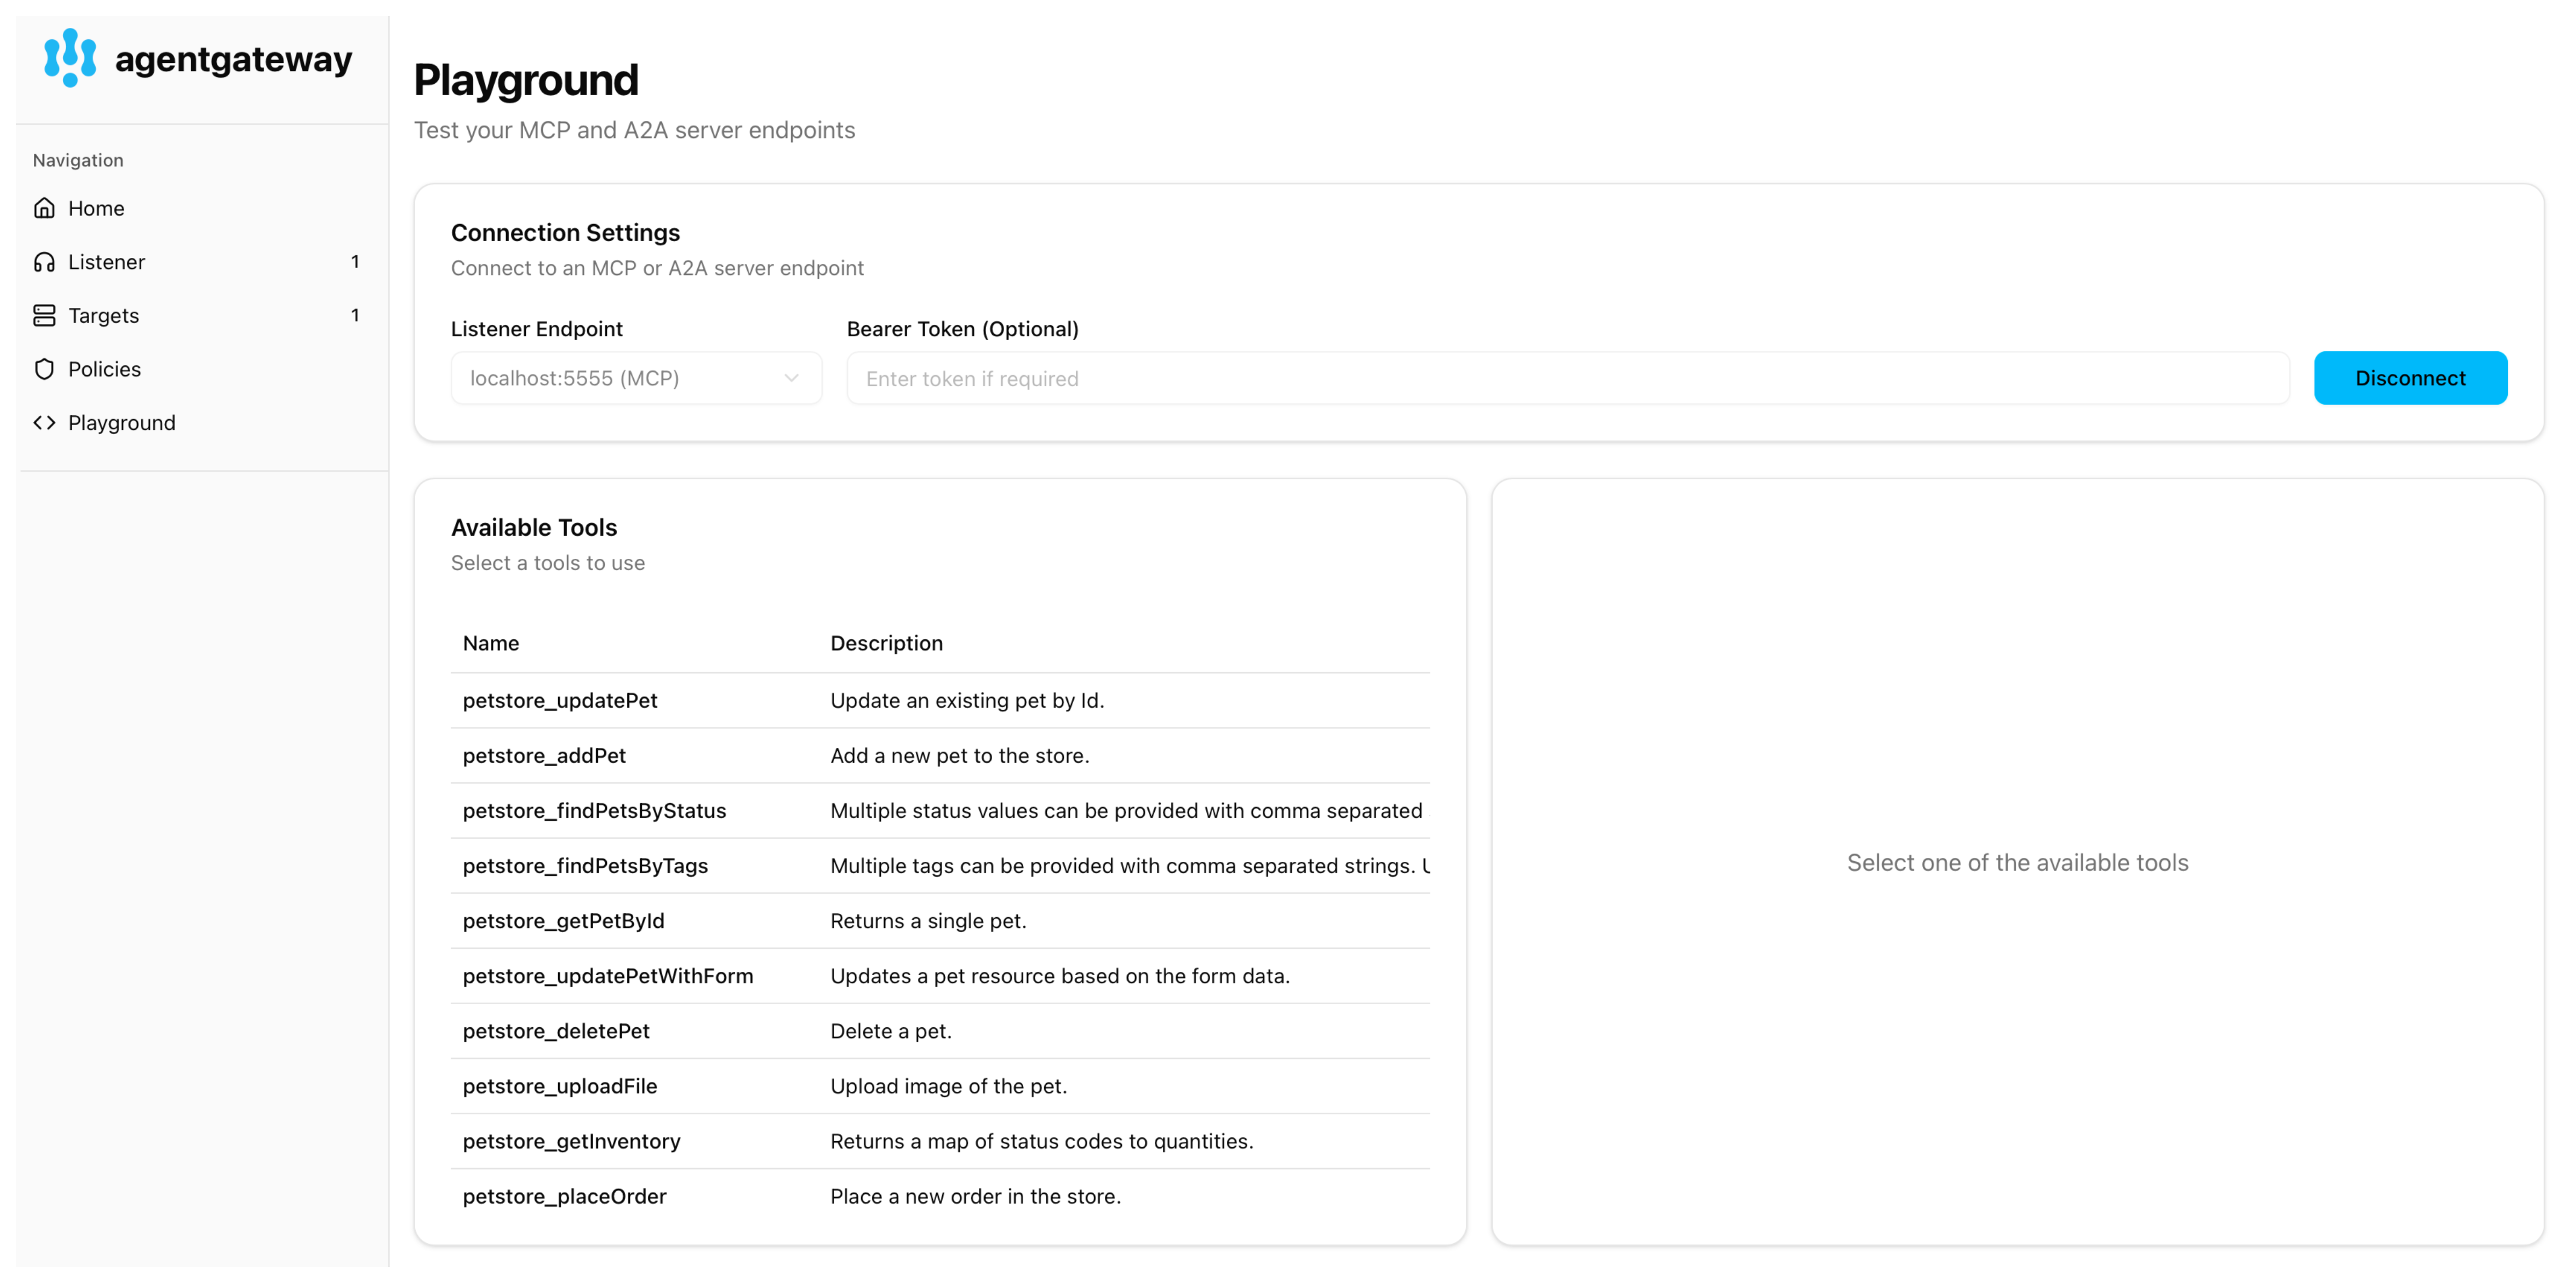
Connect to the OpenAPI server with the Agent Gateway UI playground.
-
Go to the Agent Gateway UI Playground.
-
In the Connection Settings card, select your Listener Endpoint and click Connect. The Agent Gateway UI connects to the target that you configured and retrieves the APIs that are exposed on the target.
-
Verify that you see the Petstore APIs from the OpenAPI spec as a list of Available Tools
-
-
Verify access to the Petstore APIs.
-
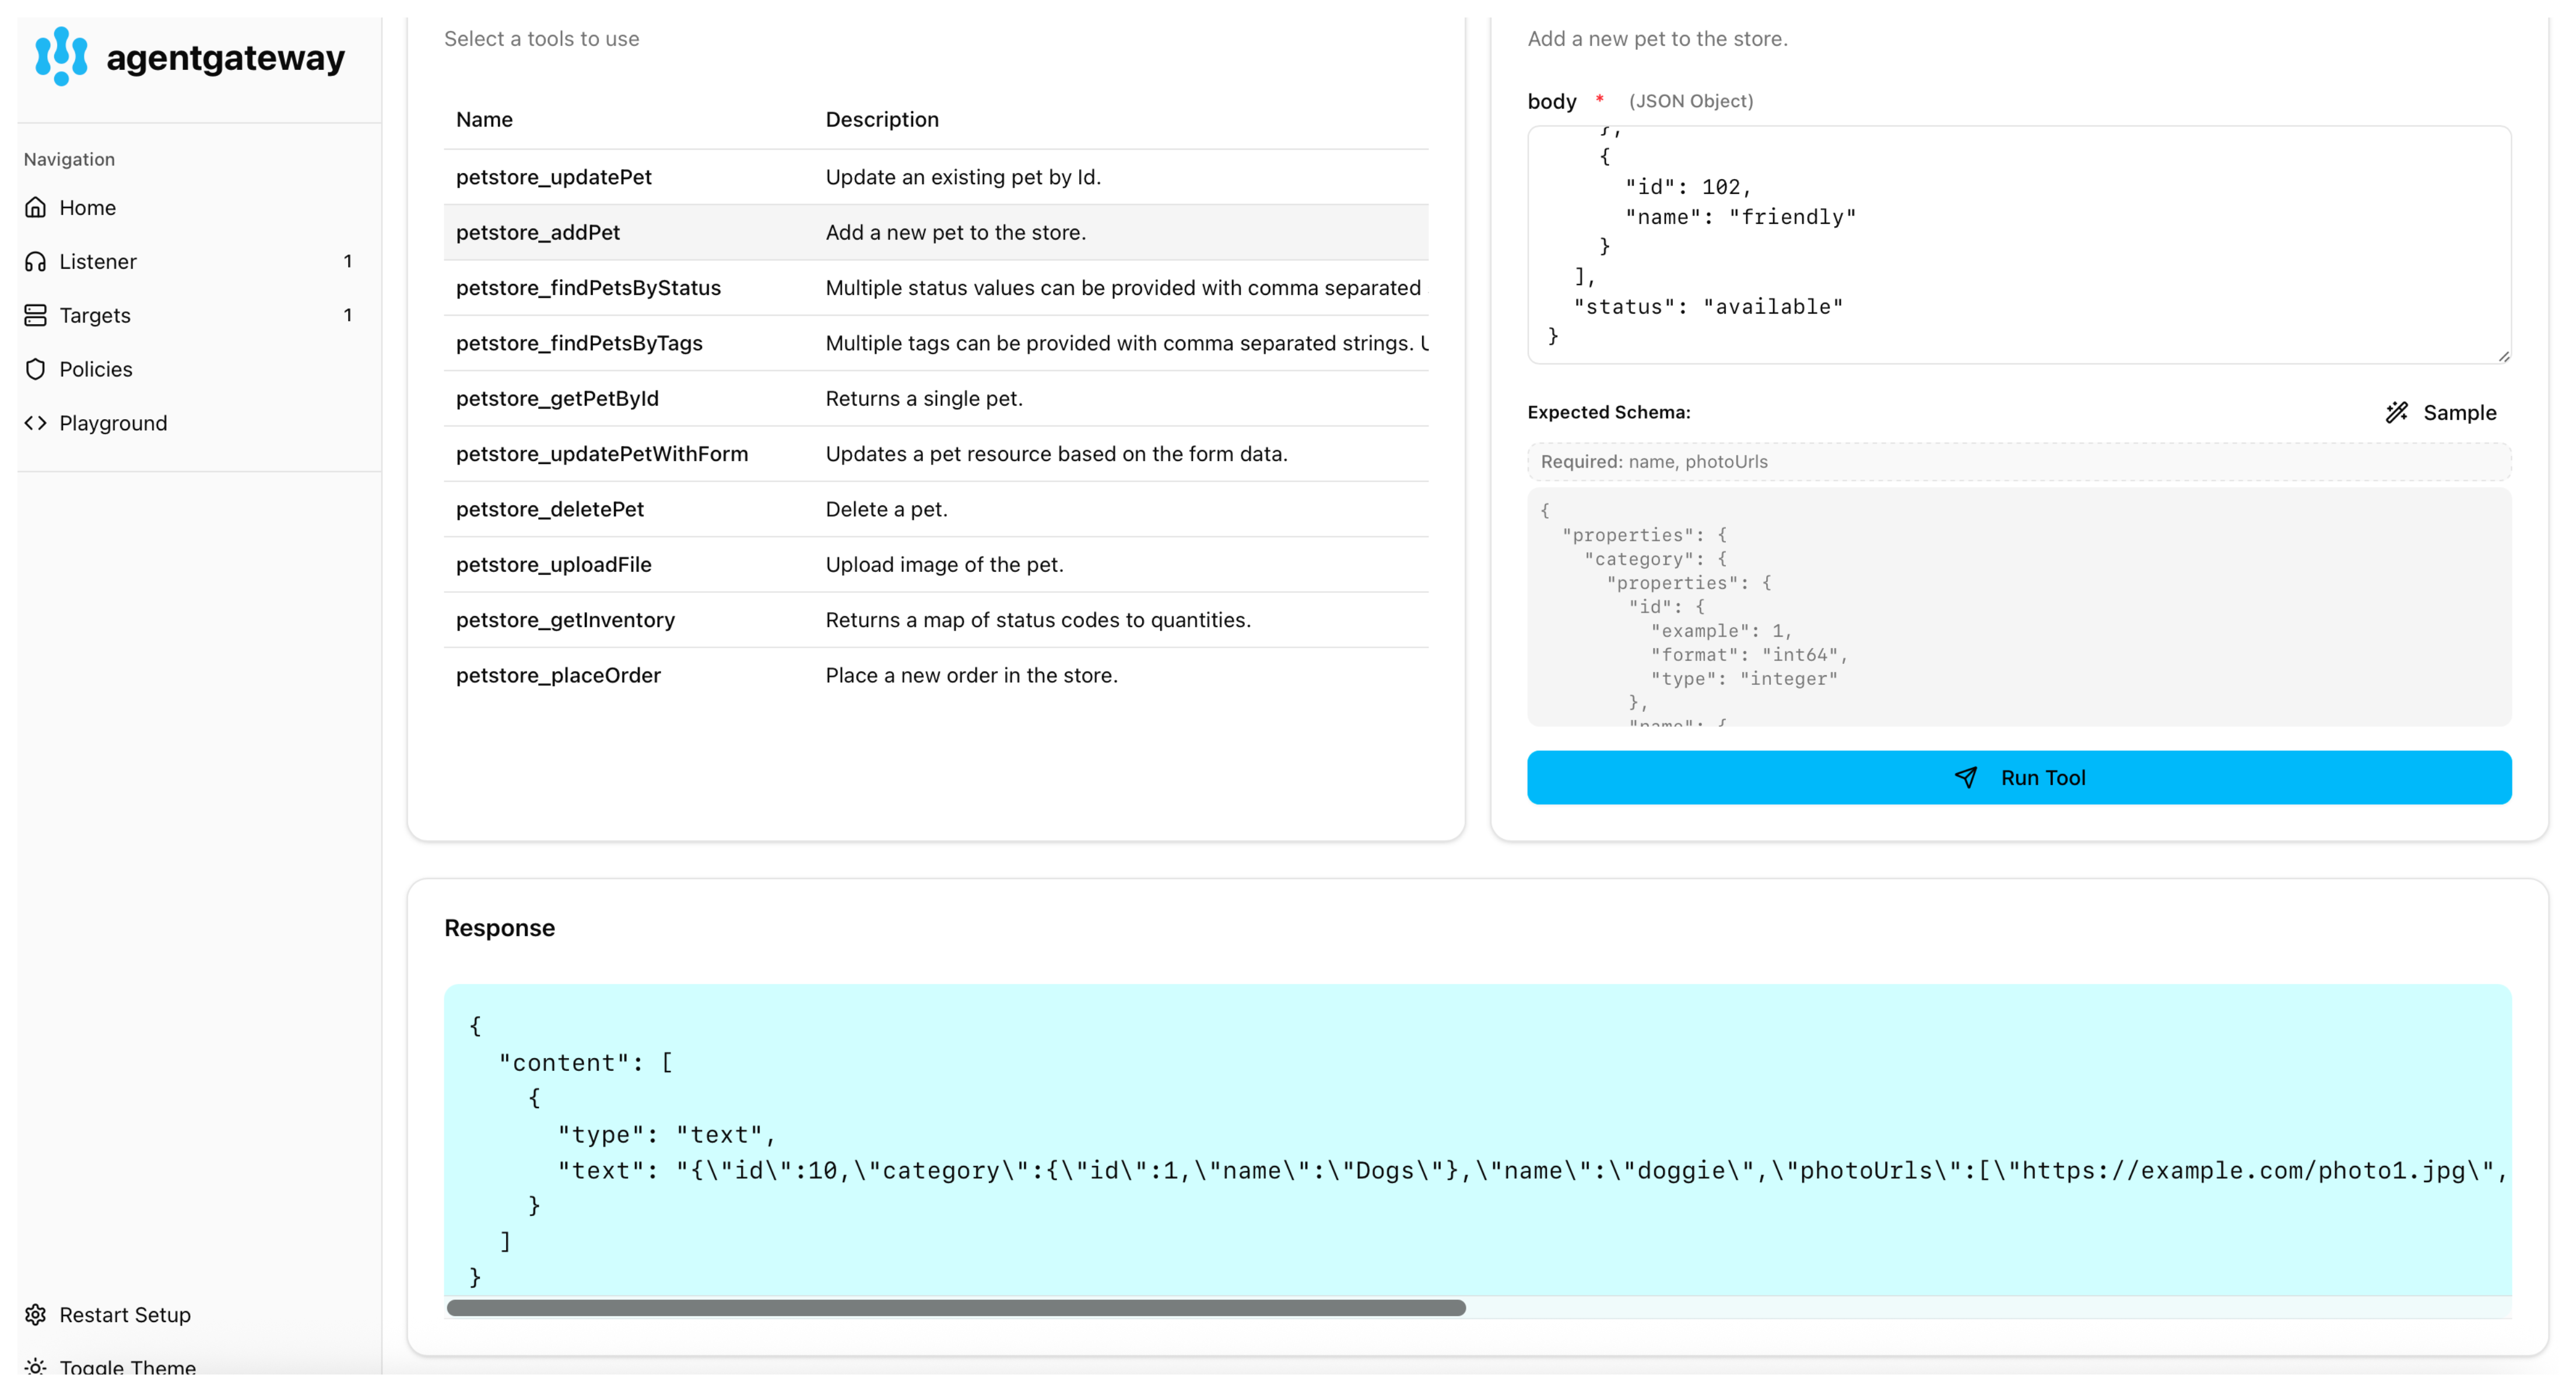
Select the
petstore_addPetAPI. -
In the body field, enter the details for your pet, such as the ID and name for the pet category and your pet, a URL to a photo of your pet, the pet’s status in the store, and optionally any tags. You can use the following example JSON file.
{ "id": 10, "category": { "id": 1, "name": "Dogs" }, "name": "doggie", "photoUrls": [ "https://example.com/photo1.jpg", "https://example.com/photo2.jpg" ], "tags": [ { "id": 101, "name": "fluffy" }, { "id": 102, "name": "friendly" } ], "status": "available" } -
Click Run Tool. Verify that the pet is added to the petstore.
-