MCP multiplexing
Federate tools of multiple MCP servers on the agentgateway by using MCP multiplexing.
Before you begin
Configure the agentgateway
-
Download a multiplex configuration for your agentgateway.
curl -L https://raw.githubusercontent.com/agentgateway/agentgateway/refs/heads/main/examples/multiplex/config.yaml -o config.yaml -
Review the configuration file.
cat config.yamlbinds: - port: 3000 listeners: - routes: - backends: - mcp: targets: - name: time stdio: cmd: uvx args: ["mcp-server-time"] - name: everything stdio: cmd: npx args: ["@modelcontextprotocol/server-everything"]- Listener: An HTTP listener is configured and bound on port 3000. It includes a basic route that matches all traffic to an MCP backend.
- Backend: The backend defines two targets:
timeandeverything. Note that the target names cannot include underscores (_). These targets are exposed together a single MCP server to clients.
-
Optional: To use the agentgateway UI playground later, add the following CORS policy to your
config.yamlfile. The config automatically reloads when you save the file.binds: - post: 3000 listeners: - routes: - policies: cors: allowOrigins: - "*" allowHeaders: - "*" backends: ... -
Run the agentgateway.
agentgateway -f config.yaml
Verify access to tools
-
Open the agentgateway UI to view your listener and target configuration.
-
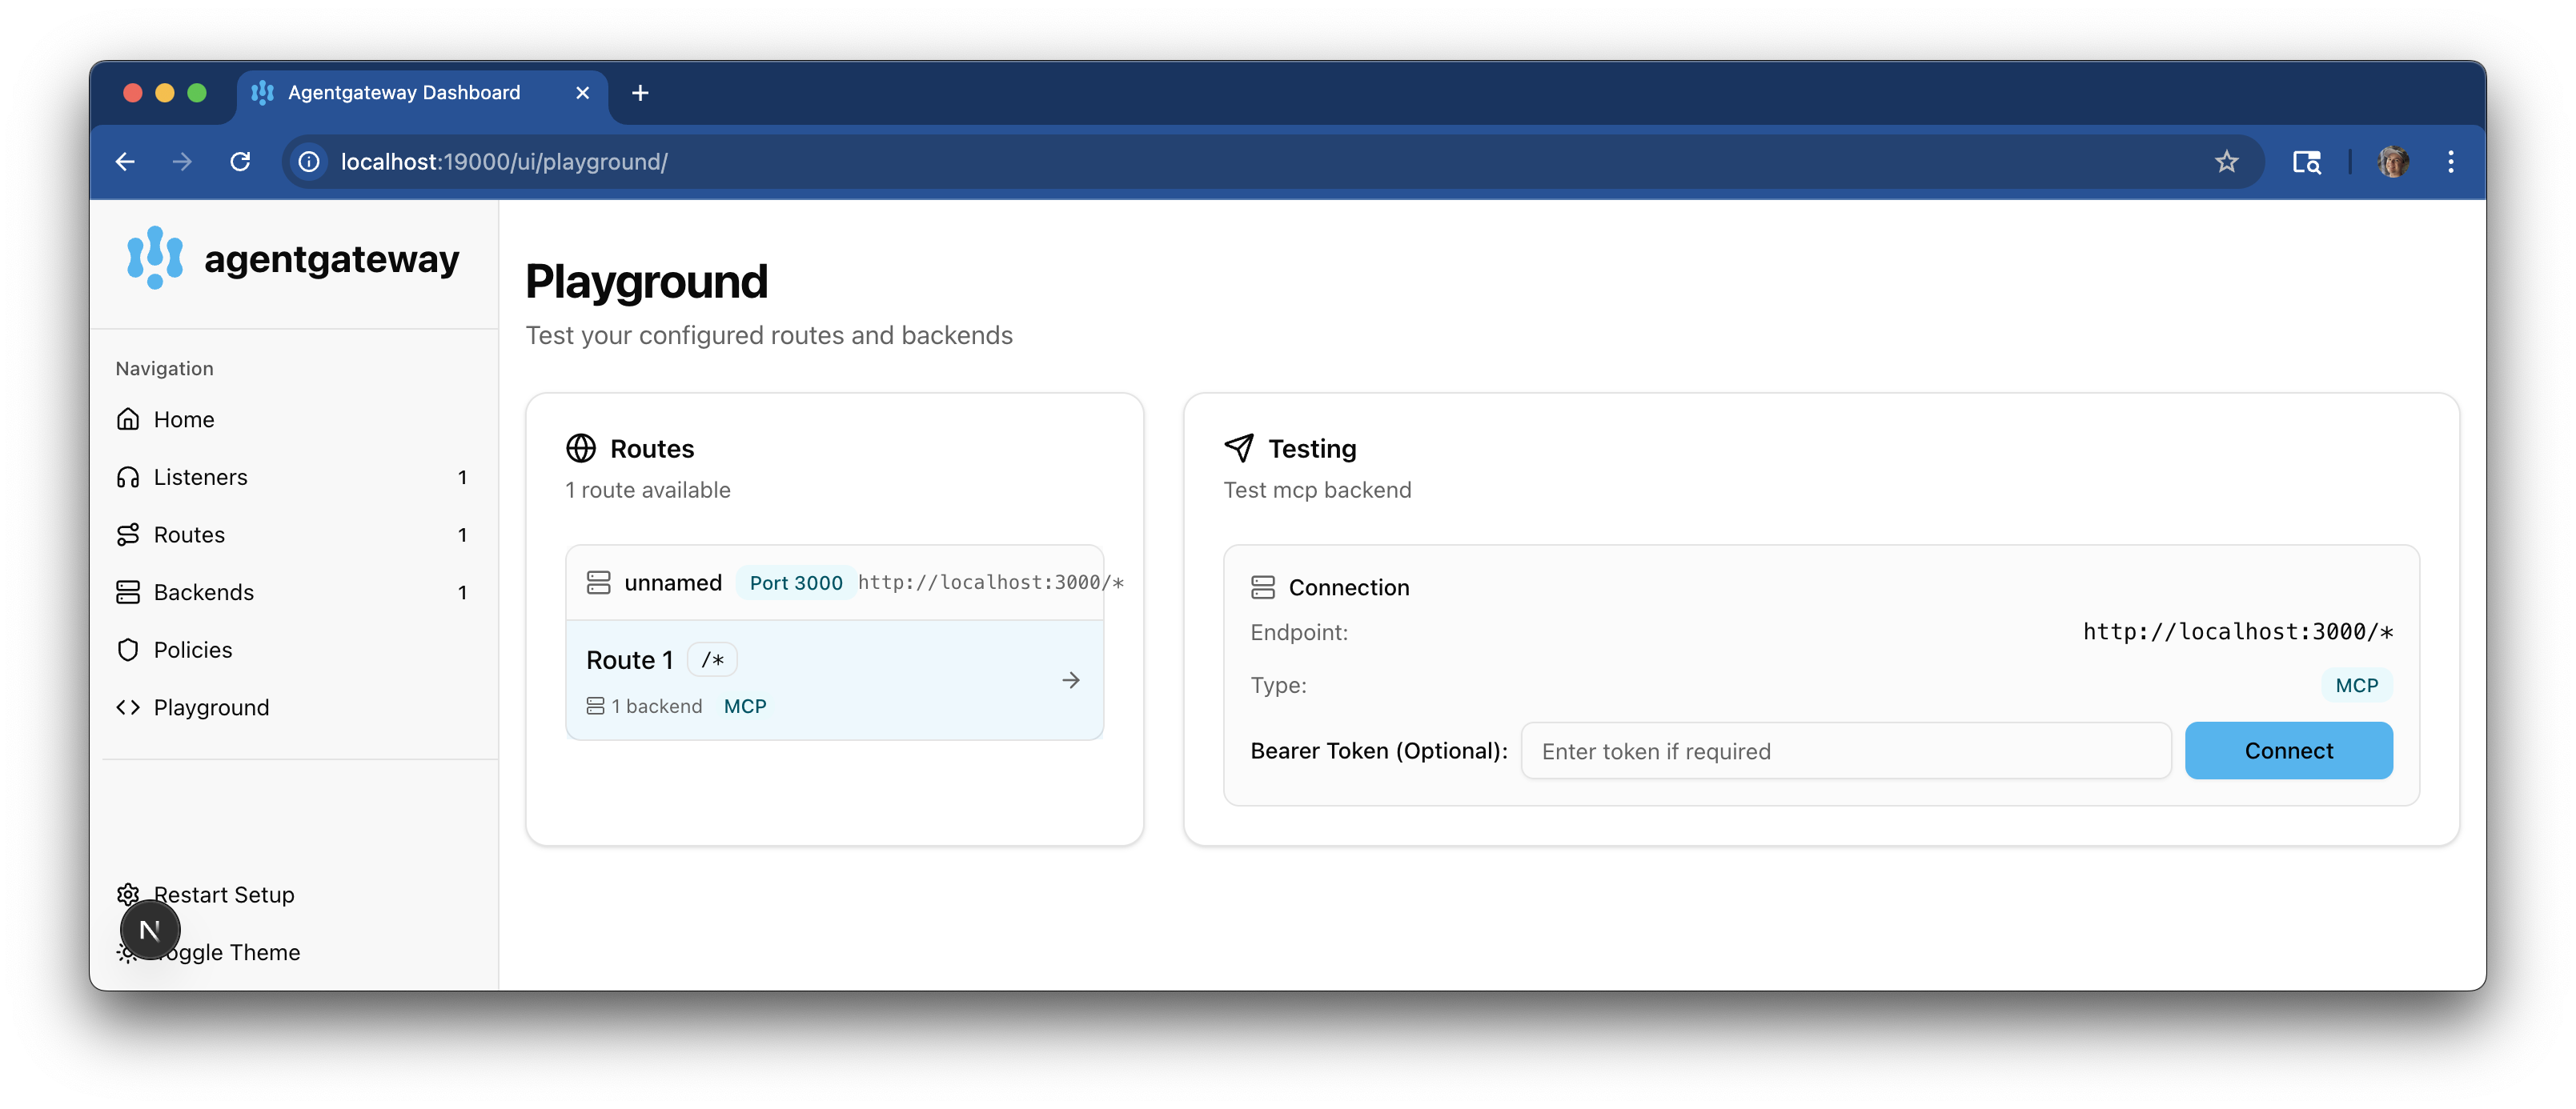
Connect to the MCP test server with the agentgateway UI playground.
-
From the navigation menu, click Playground.

-
In the Testing card, review your Connection details and click Connect. The agentgateway UI connects to the targets that you configured and retrieves the tools that are exposed on the targets.
-
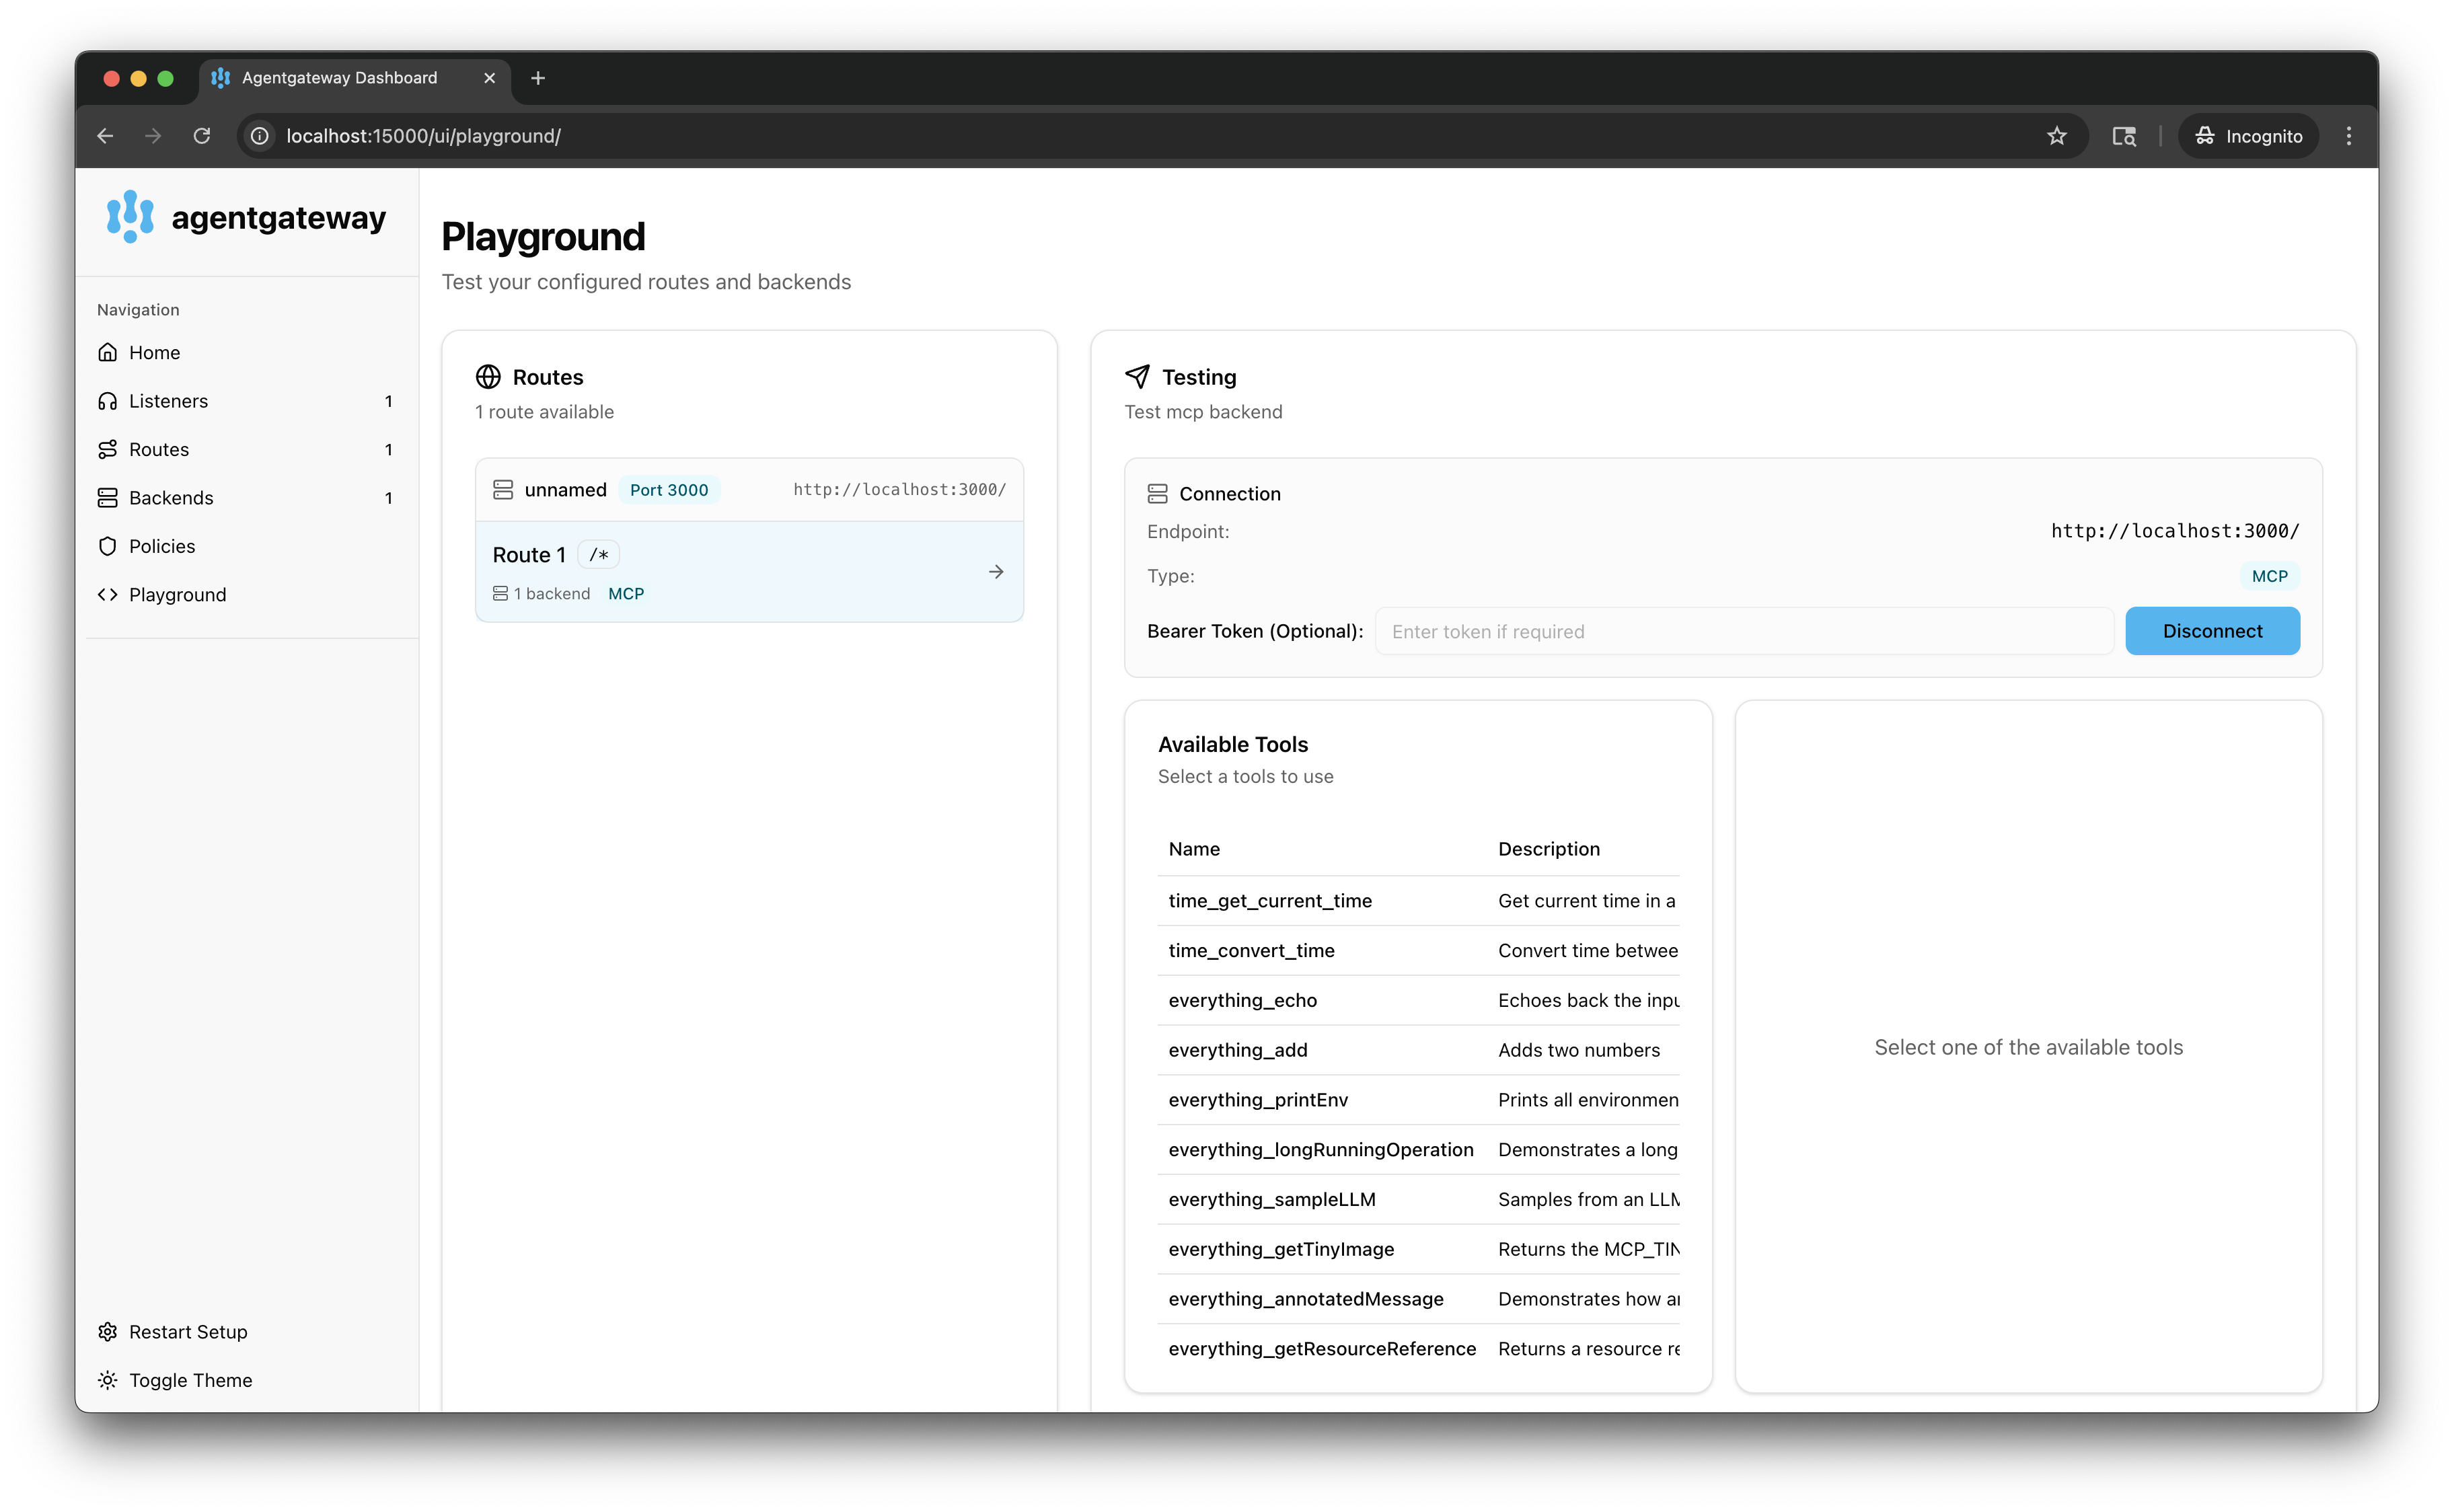
Verify that you see a list of Available Tools. Note that the tools are listed twice, one time with the prefix
timeand one time with the prefixeverything. You now have a federated view of all the tools that are exposed on all defined targets.
-
-
Verify access to tools from both targets.
-
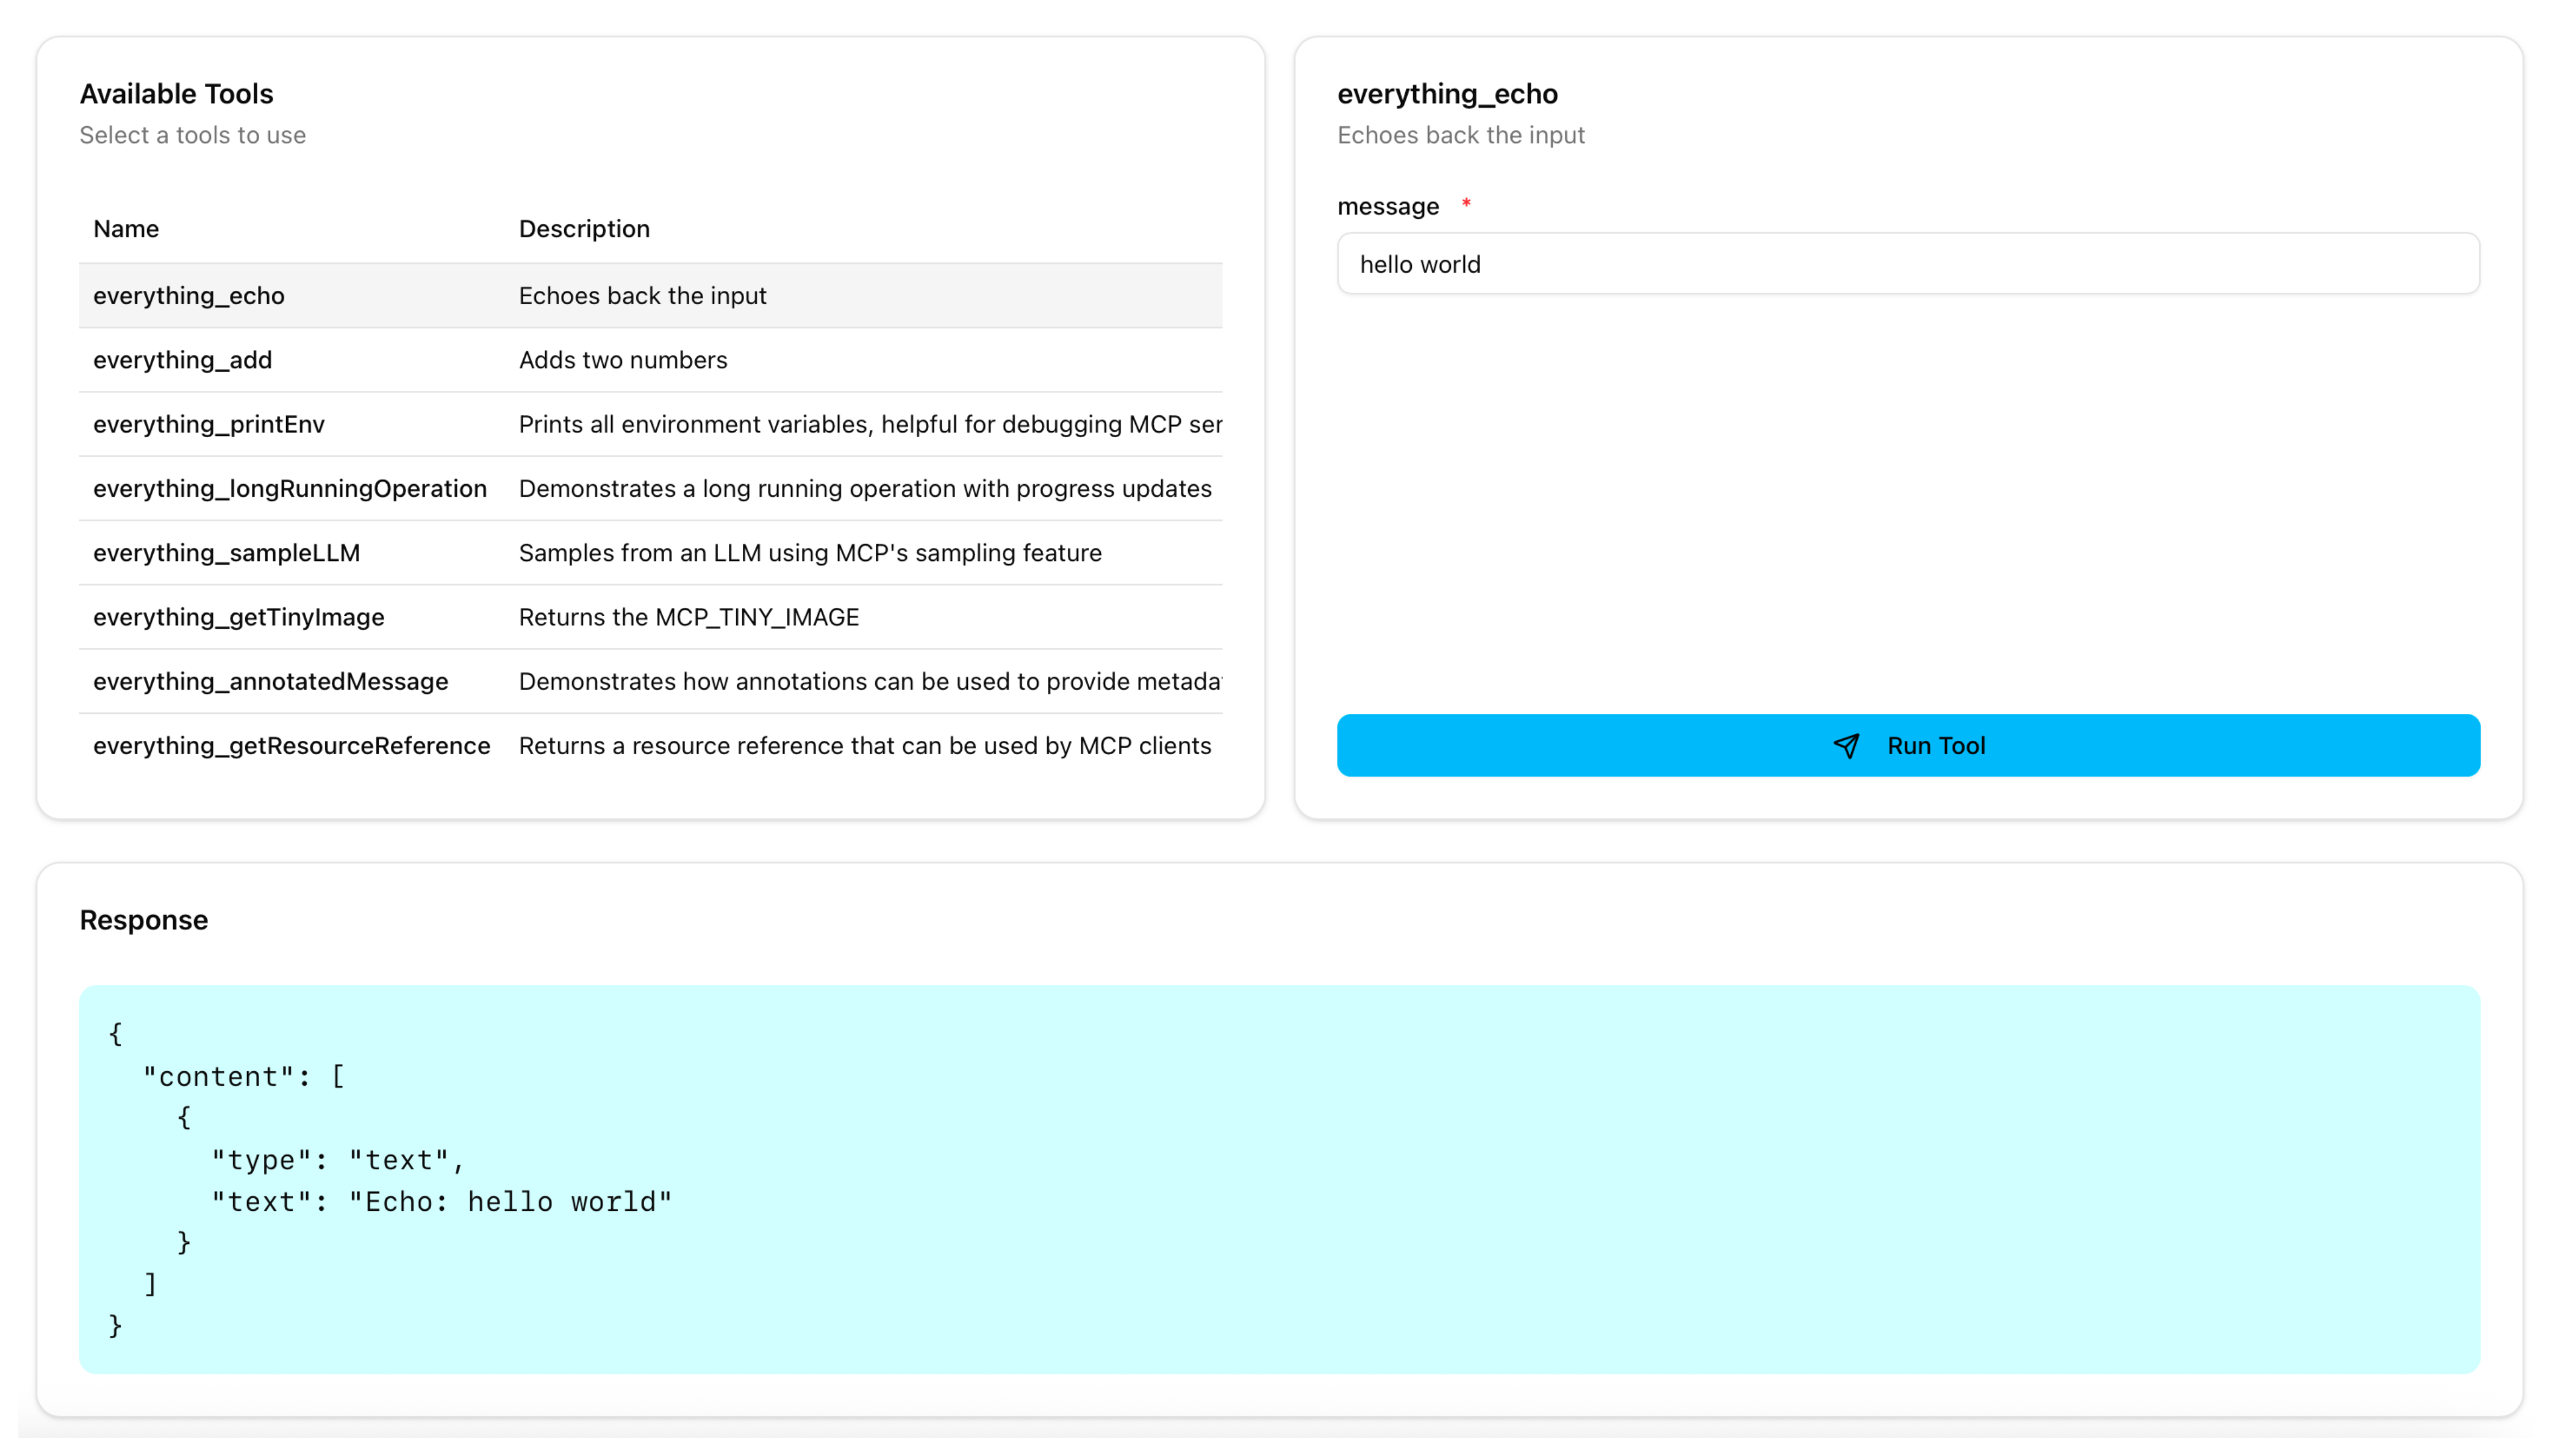
From the Available Tools list, select the
everything_echotool. -
In the message field, enter any string, such as
hello world, and click Run Tool. -
Verify that you see your message echoed in the Response card.

-
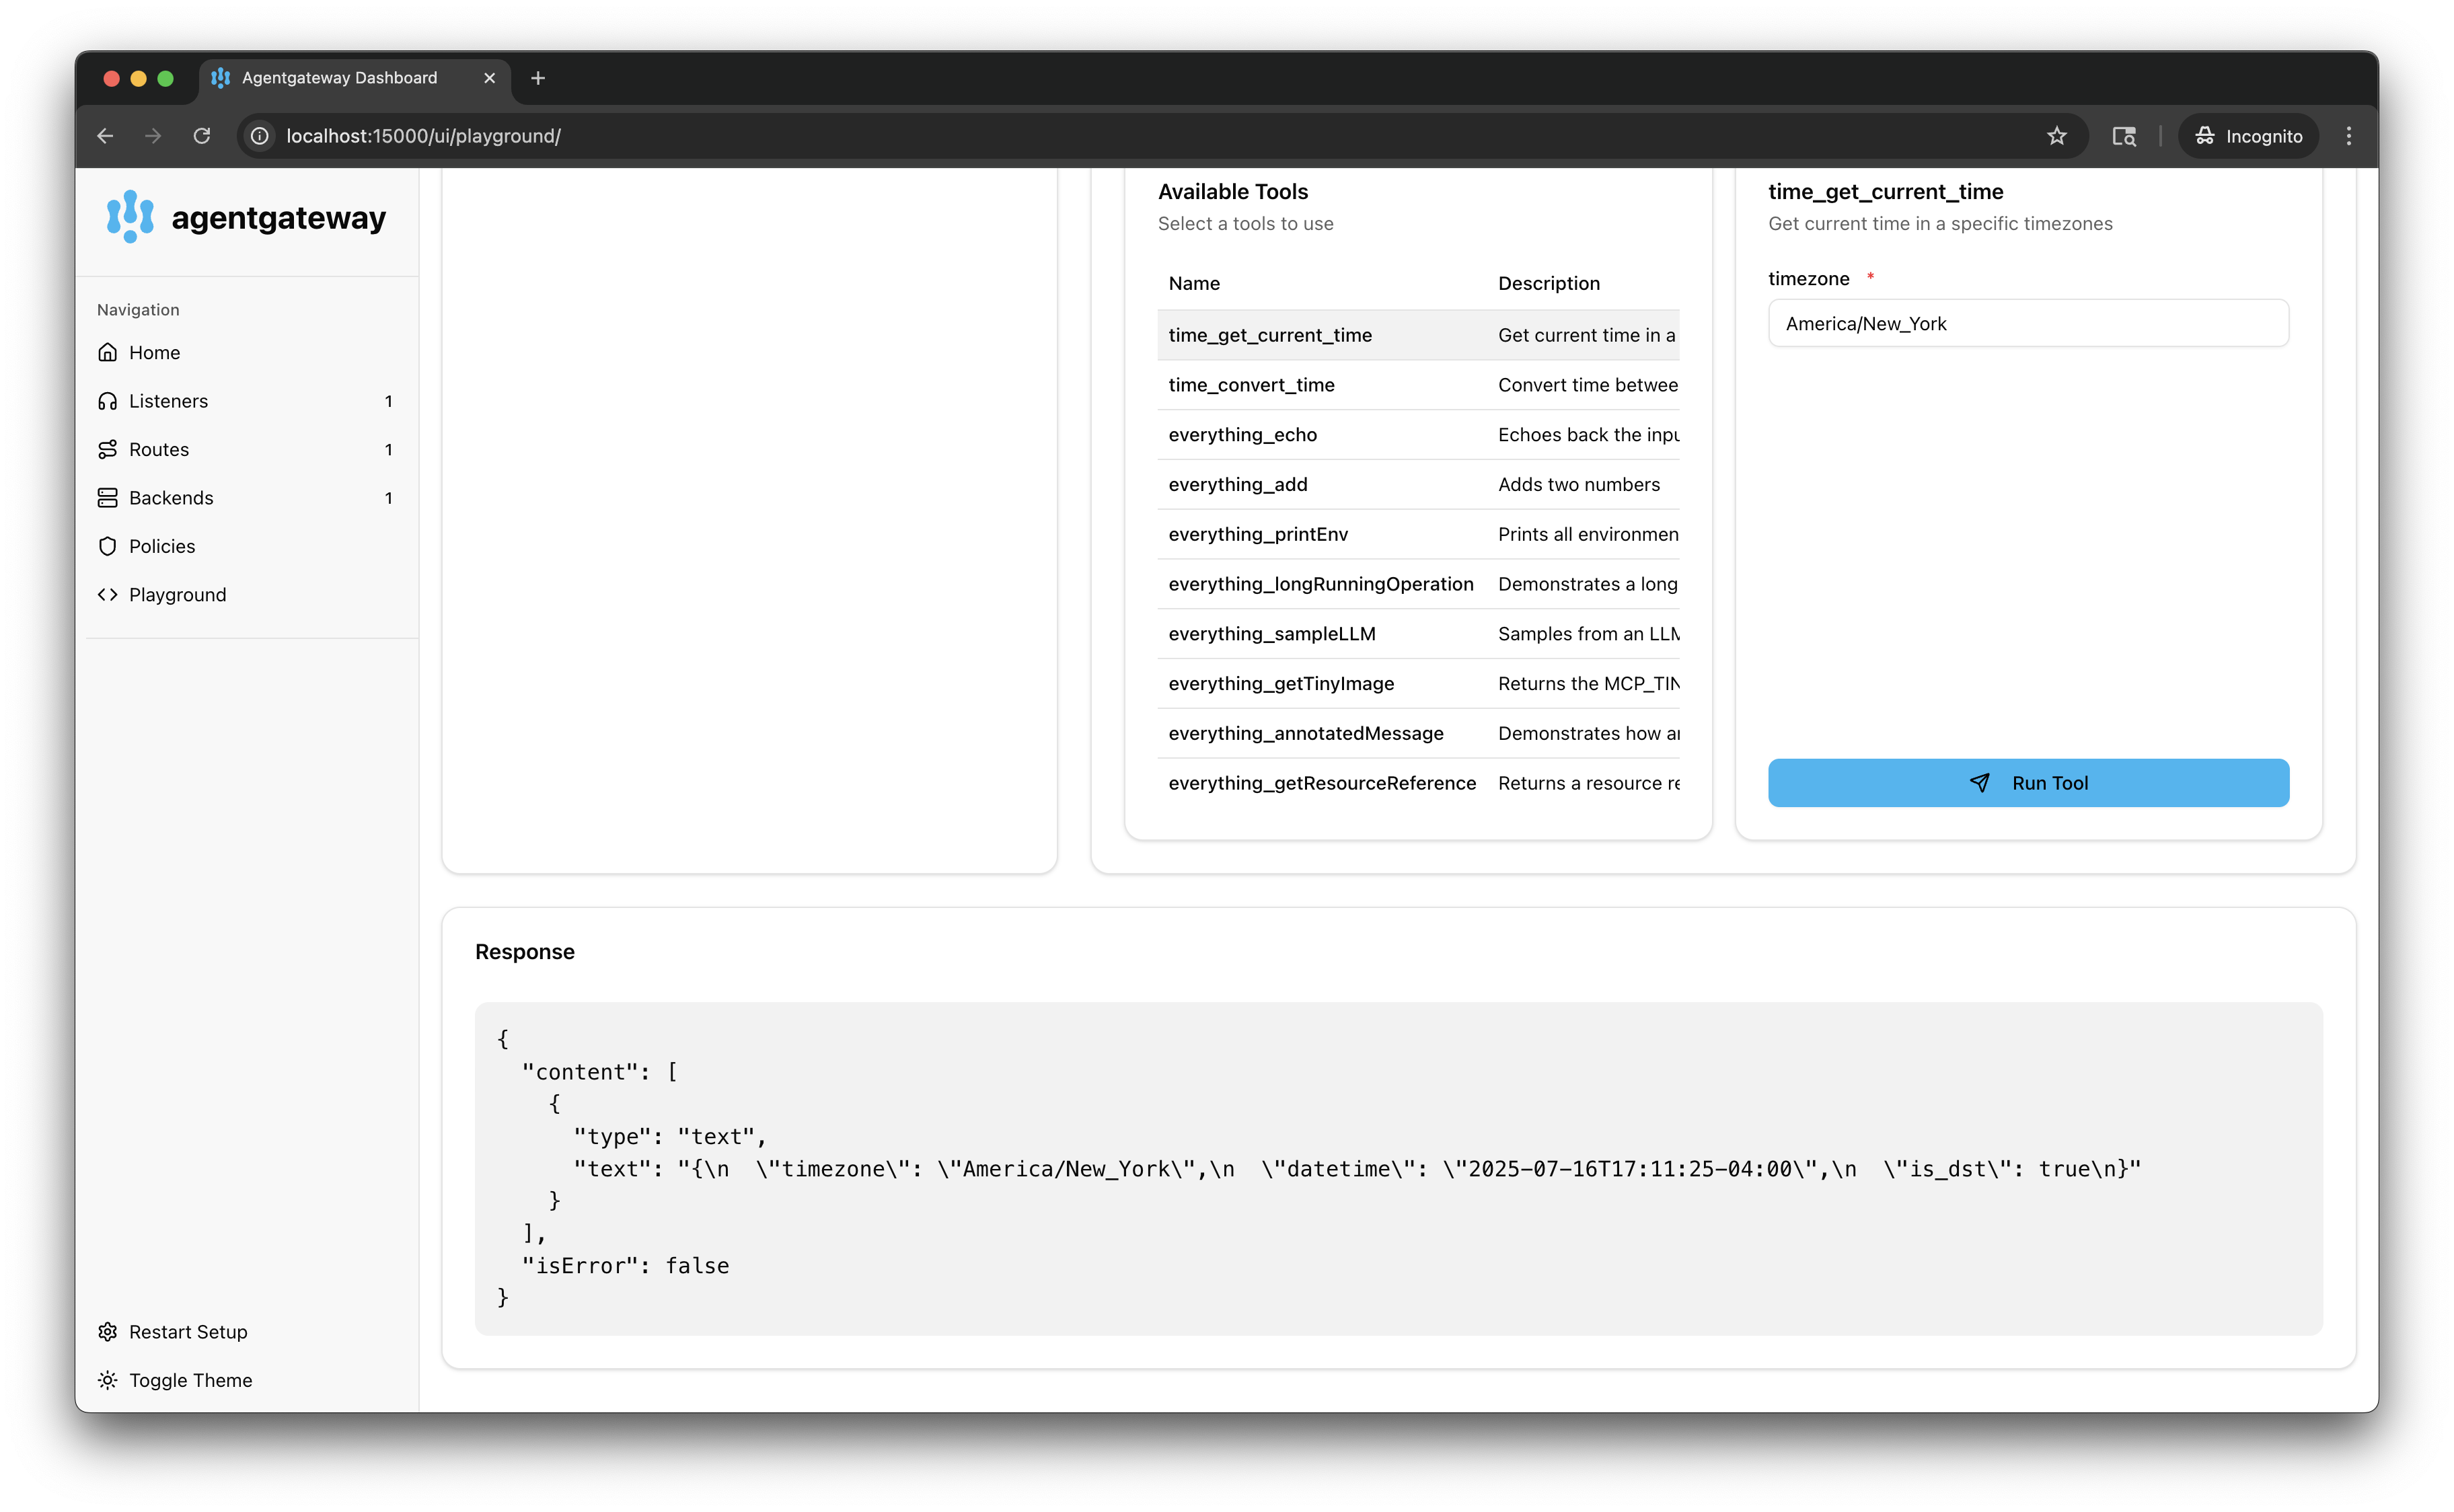
Repeat the steps with the
time_get_current_timetool with your timezone, such asAmerica/New_York.
-