MCP
An MCP backend allows exposing MCP servers through the agentgateway.
About MCP
Model Context Protocol (MCP) is an open protocol that standardizes how Large Language Model (LLM) applications connect to various external data sources and tools. Without MCP, you need to implement custom integrations for each tool that your LLM application needs to access. However, this approach is hard to maintain and can cause issues when you want to scale your environment. With MCP, you can significantly speed up, simplify, and standardize these types of integrations.
An MCP server exposes external data sources and tools so that LLM applications can access them. Typically, you want to deploy these servers remotely and have authorization mechanisms in place so that LLM applications can safely access the data.
With agentgateway, you can connect to one or multiple MCP servers in any environment. The agentgateway proxies requests to the MCP tool that is exposed on the server. You can also use the agentgateway to federate tools from multiple MCP servers. For more information, see the MCP multiplexing guide.
Before you begin
Install theagentgateway binary.
Configure the agentgateway
-
Download an MCP configuration for your agentgateway.
curl -L https://raw.githubusercontent.com/agentgateway/agentgateway/refs/heads/main/examples/basic/config.yaml -o config.yaml -
Review the configuration file.
cat config.yamlReview the following table to understand this configuration.binds: - port: 3000 listeners: - routes: - policies: cors: allowOrigins: - "*" allowHeaders: - mcp-protocol-version - content-type - cache-control backends: - mcp: targets: - name: everything stdio: cmd: npx args: ["@modelcontextprotocol/server-everything"]Field Description bindsBinds set up each port on which the agentgateway listens for incoming requests. This example configures one port. portThe port to listen on, such as 3000.listenersListeners configure how agentgateway accepts and processes incoming requests. They do this by grouping together resources such as routes and the backends that serve traffic. routesRoutes configure advanced routing features, such as traffic policies, that control how traffic is sent to the backends. In the example, the route matches all traffic. policiesPolicies configure traffic policies on routes that shape how traffic is sent to the backends. In the example, a basic CORS policy is configured to allow all origins and the mcp-protocol-versionheader. This way, the configuration works with the MCP inspector tool.backendsBackends configure the backing destination where the traffic is sent to. Backends can be MCP servers, A2A agents, or OpenAPI servers. In this example, the backend is an MCP server. targetsTargets configure the details of the backend, such as the MCP server. In this example, the target is the sample, open source MCP test server, server-everything. The server runs a bunch of tools in a single process that are useful for testing.stdioTo run the server, you use the standard input/output ( stdio) capability of the agentgateway, which allows you to pass in the command and command arguments that you want to use. In this example, thenpxcommand is used. Thenpxcommand utility lets you run a Node.js package (@modelcontextprotocol/server-everything) without installing it. If you do not havenpxon your machine, follow the instructions to install Node.js. -
Run the agentgateway.
agentgateway -f config.yaml
Verify access to tools
-
Open the agentgateway UI to view your listener and backend configuration.
-
Connect to the MCP test server with the agentgateway UI playground.
-
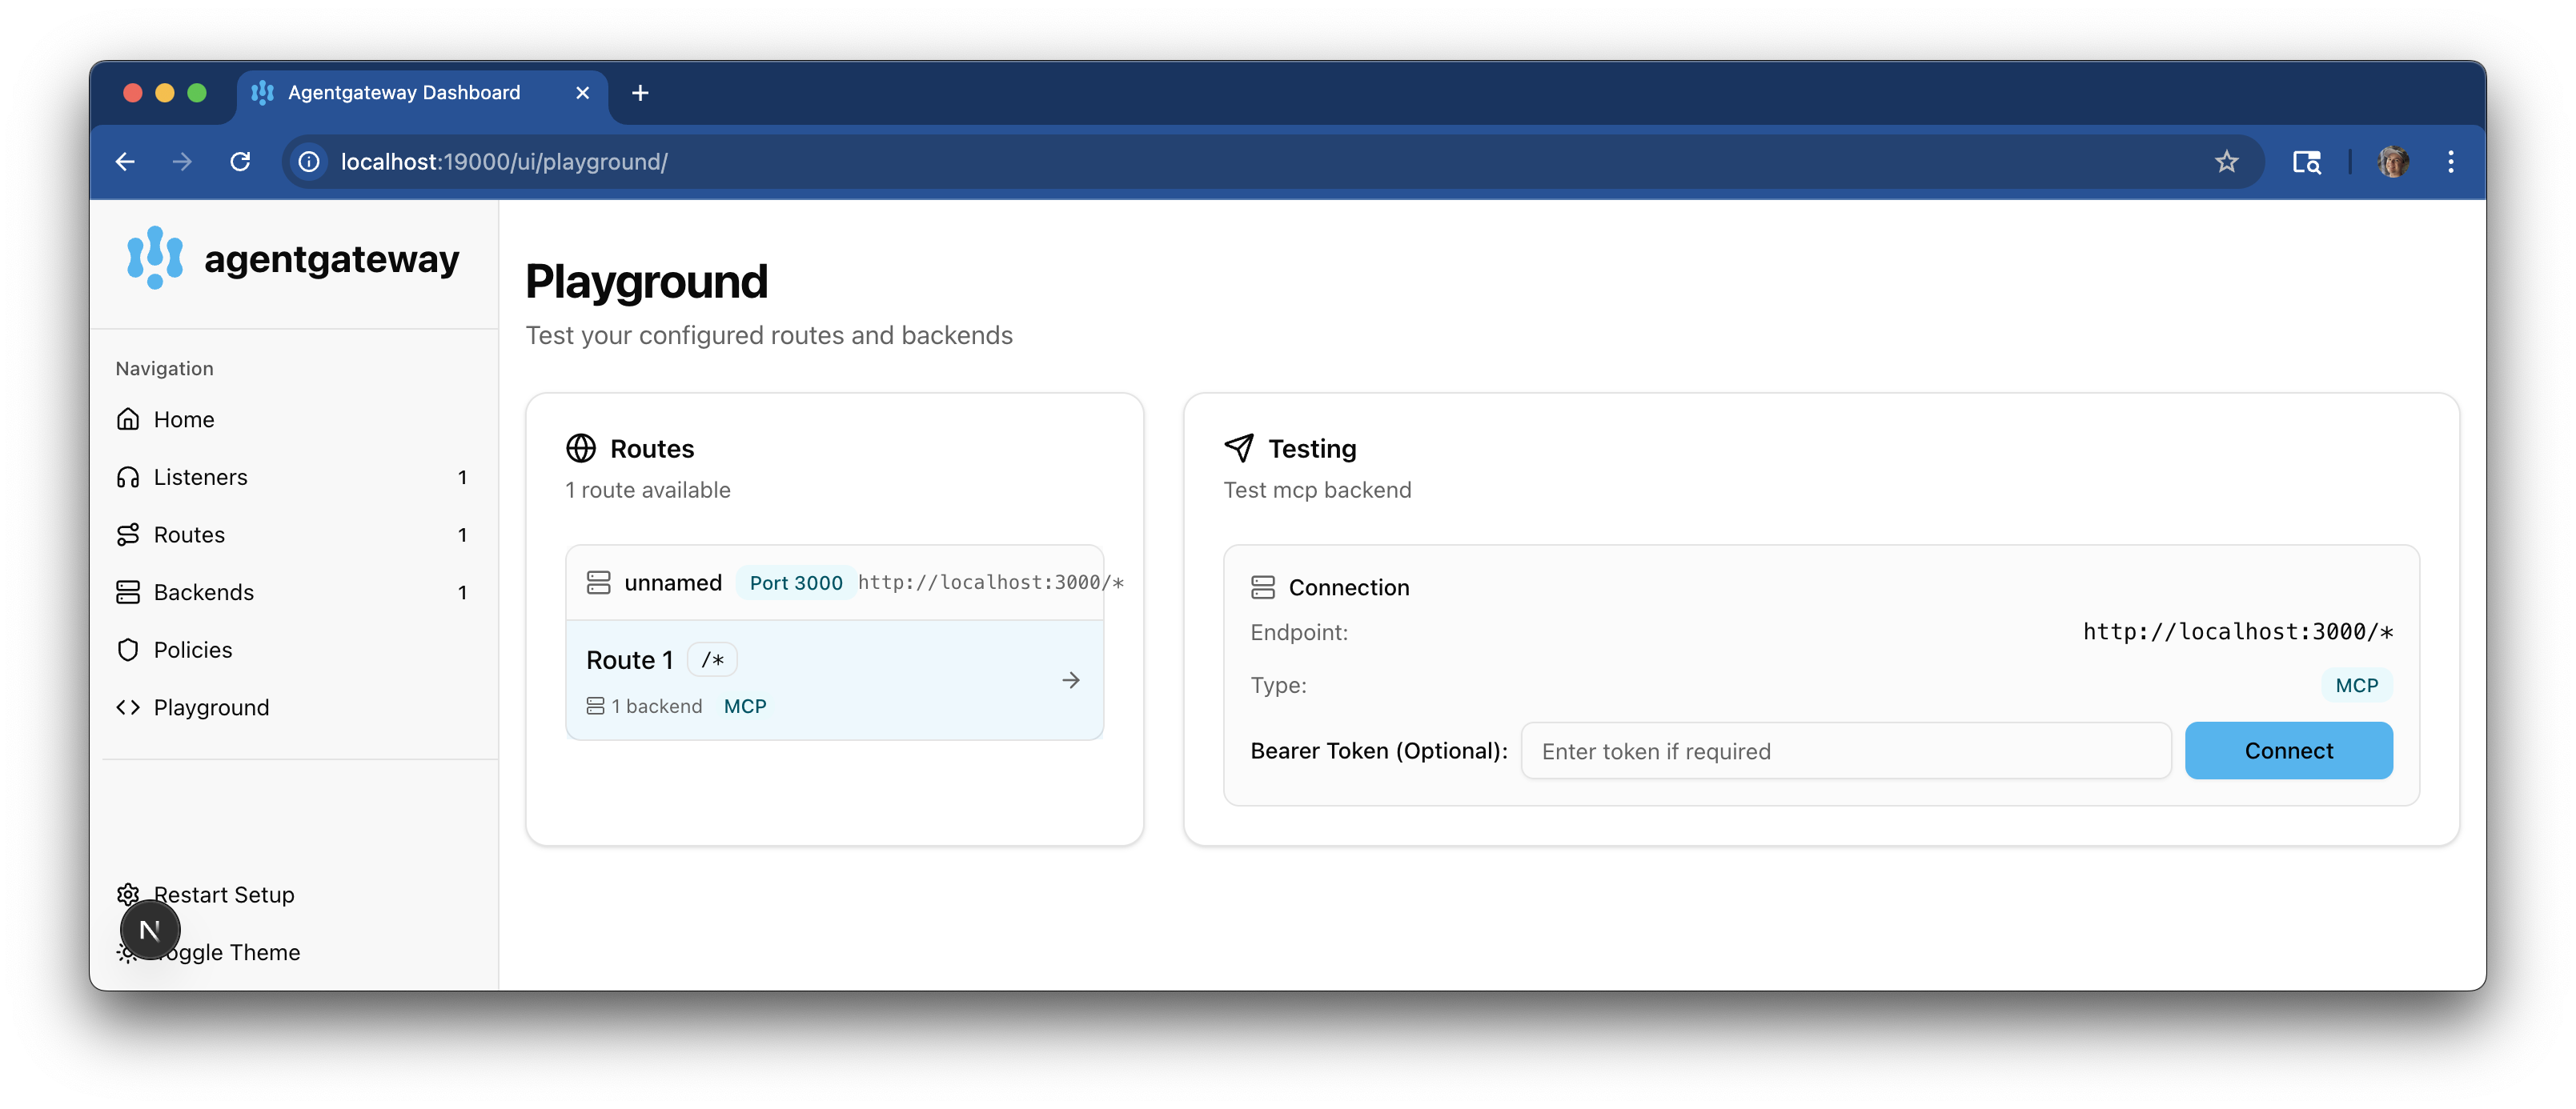
From the navigation menu, click Playground.

-
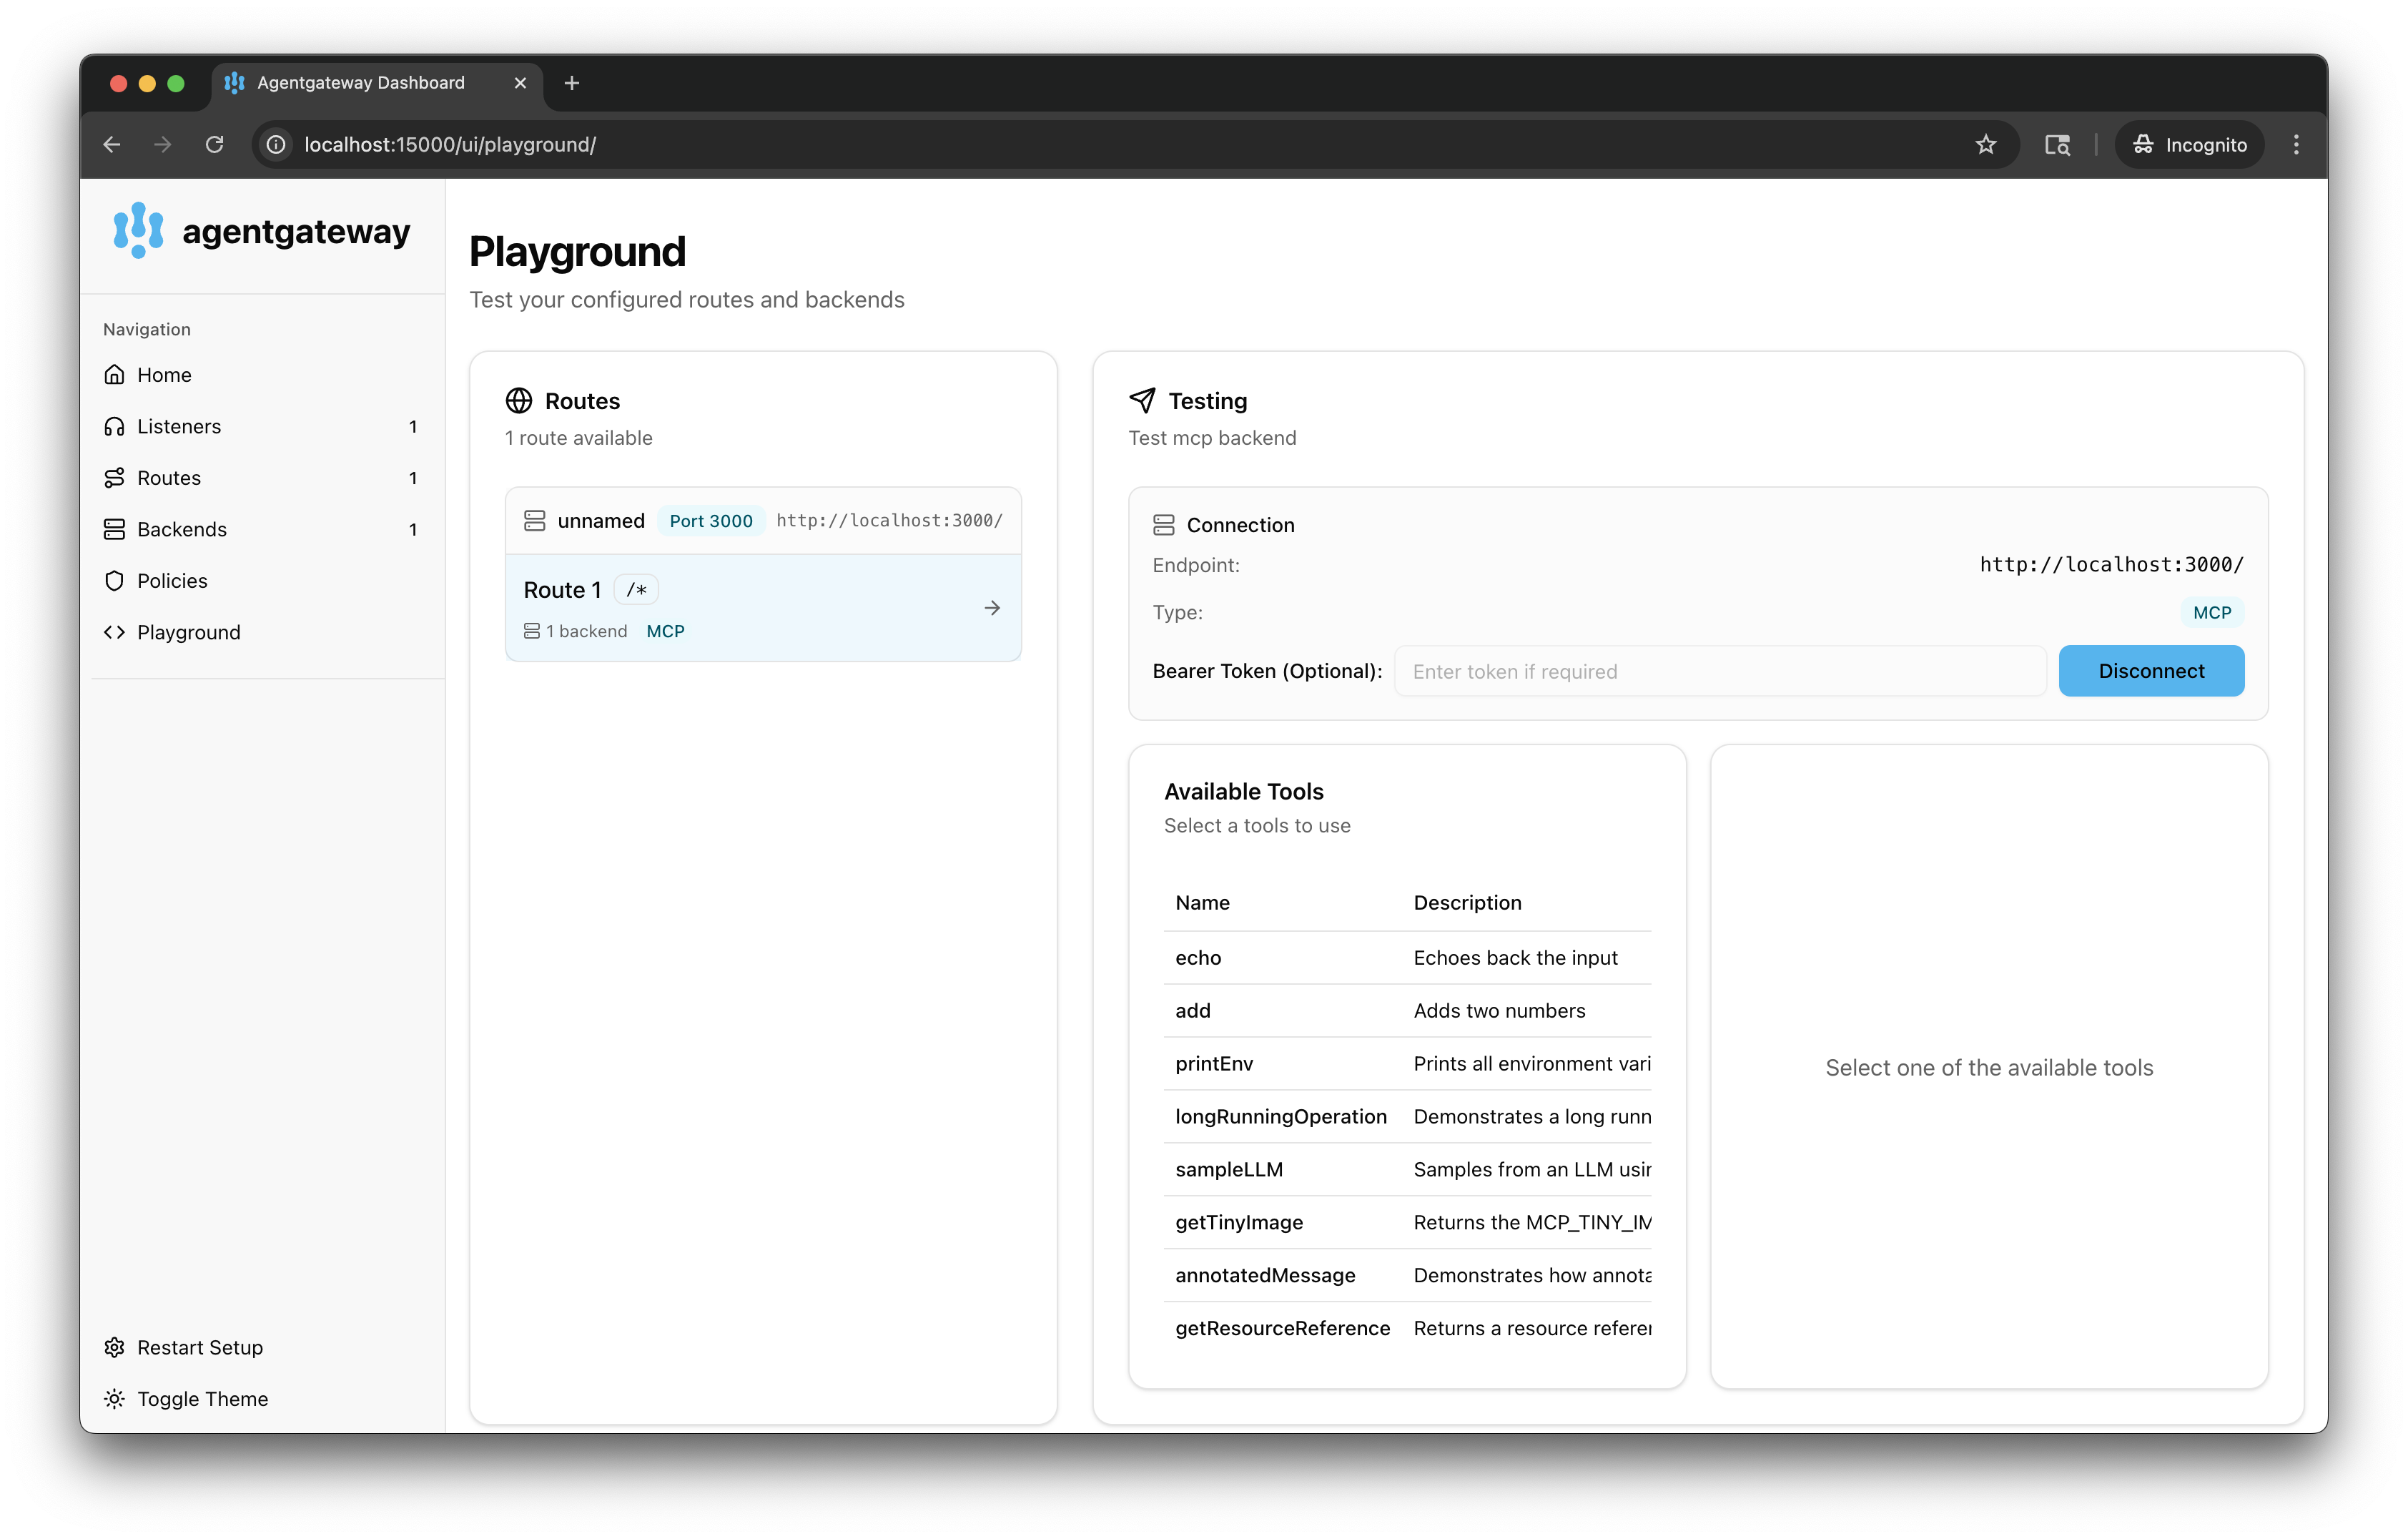
In the Testing card, review your Connection details and click Connect. The agentgateway UI connects to the target that you configured and retrieves the tools that are exposed on the target.
-
Verify that you see a list of Available Tools.

-
-
Verify access to a tool.
-
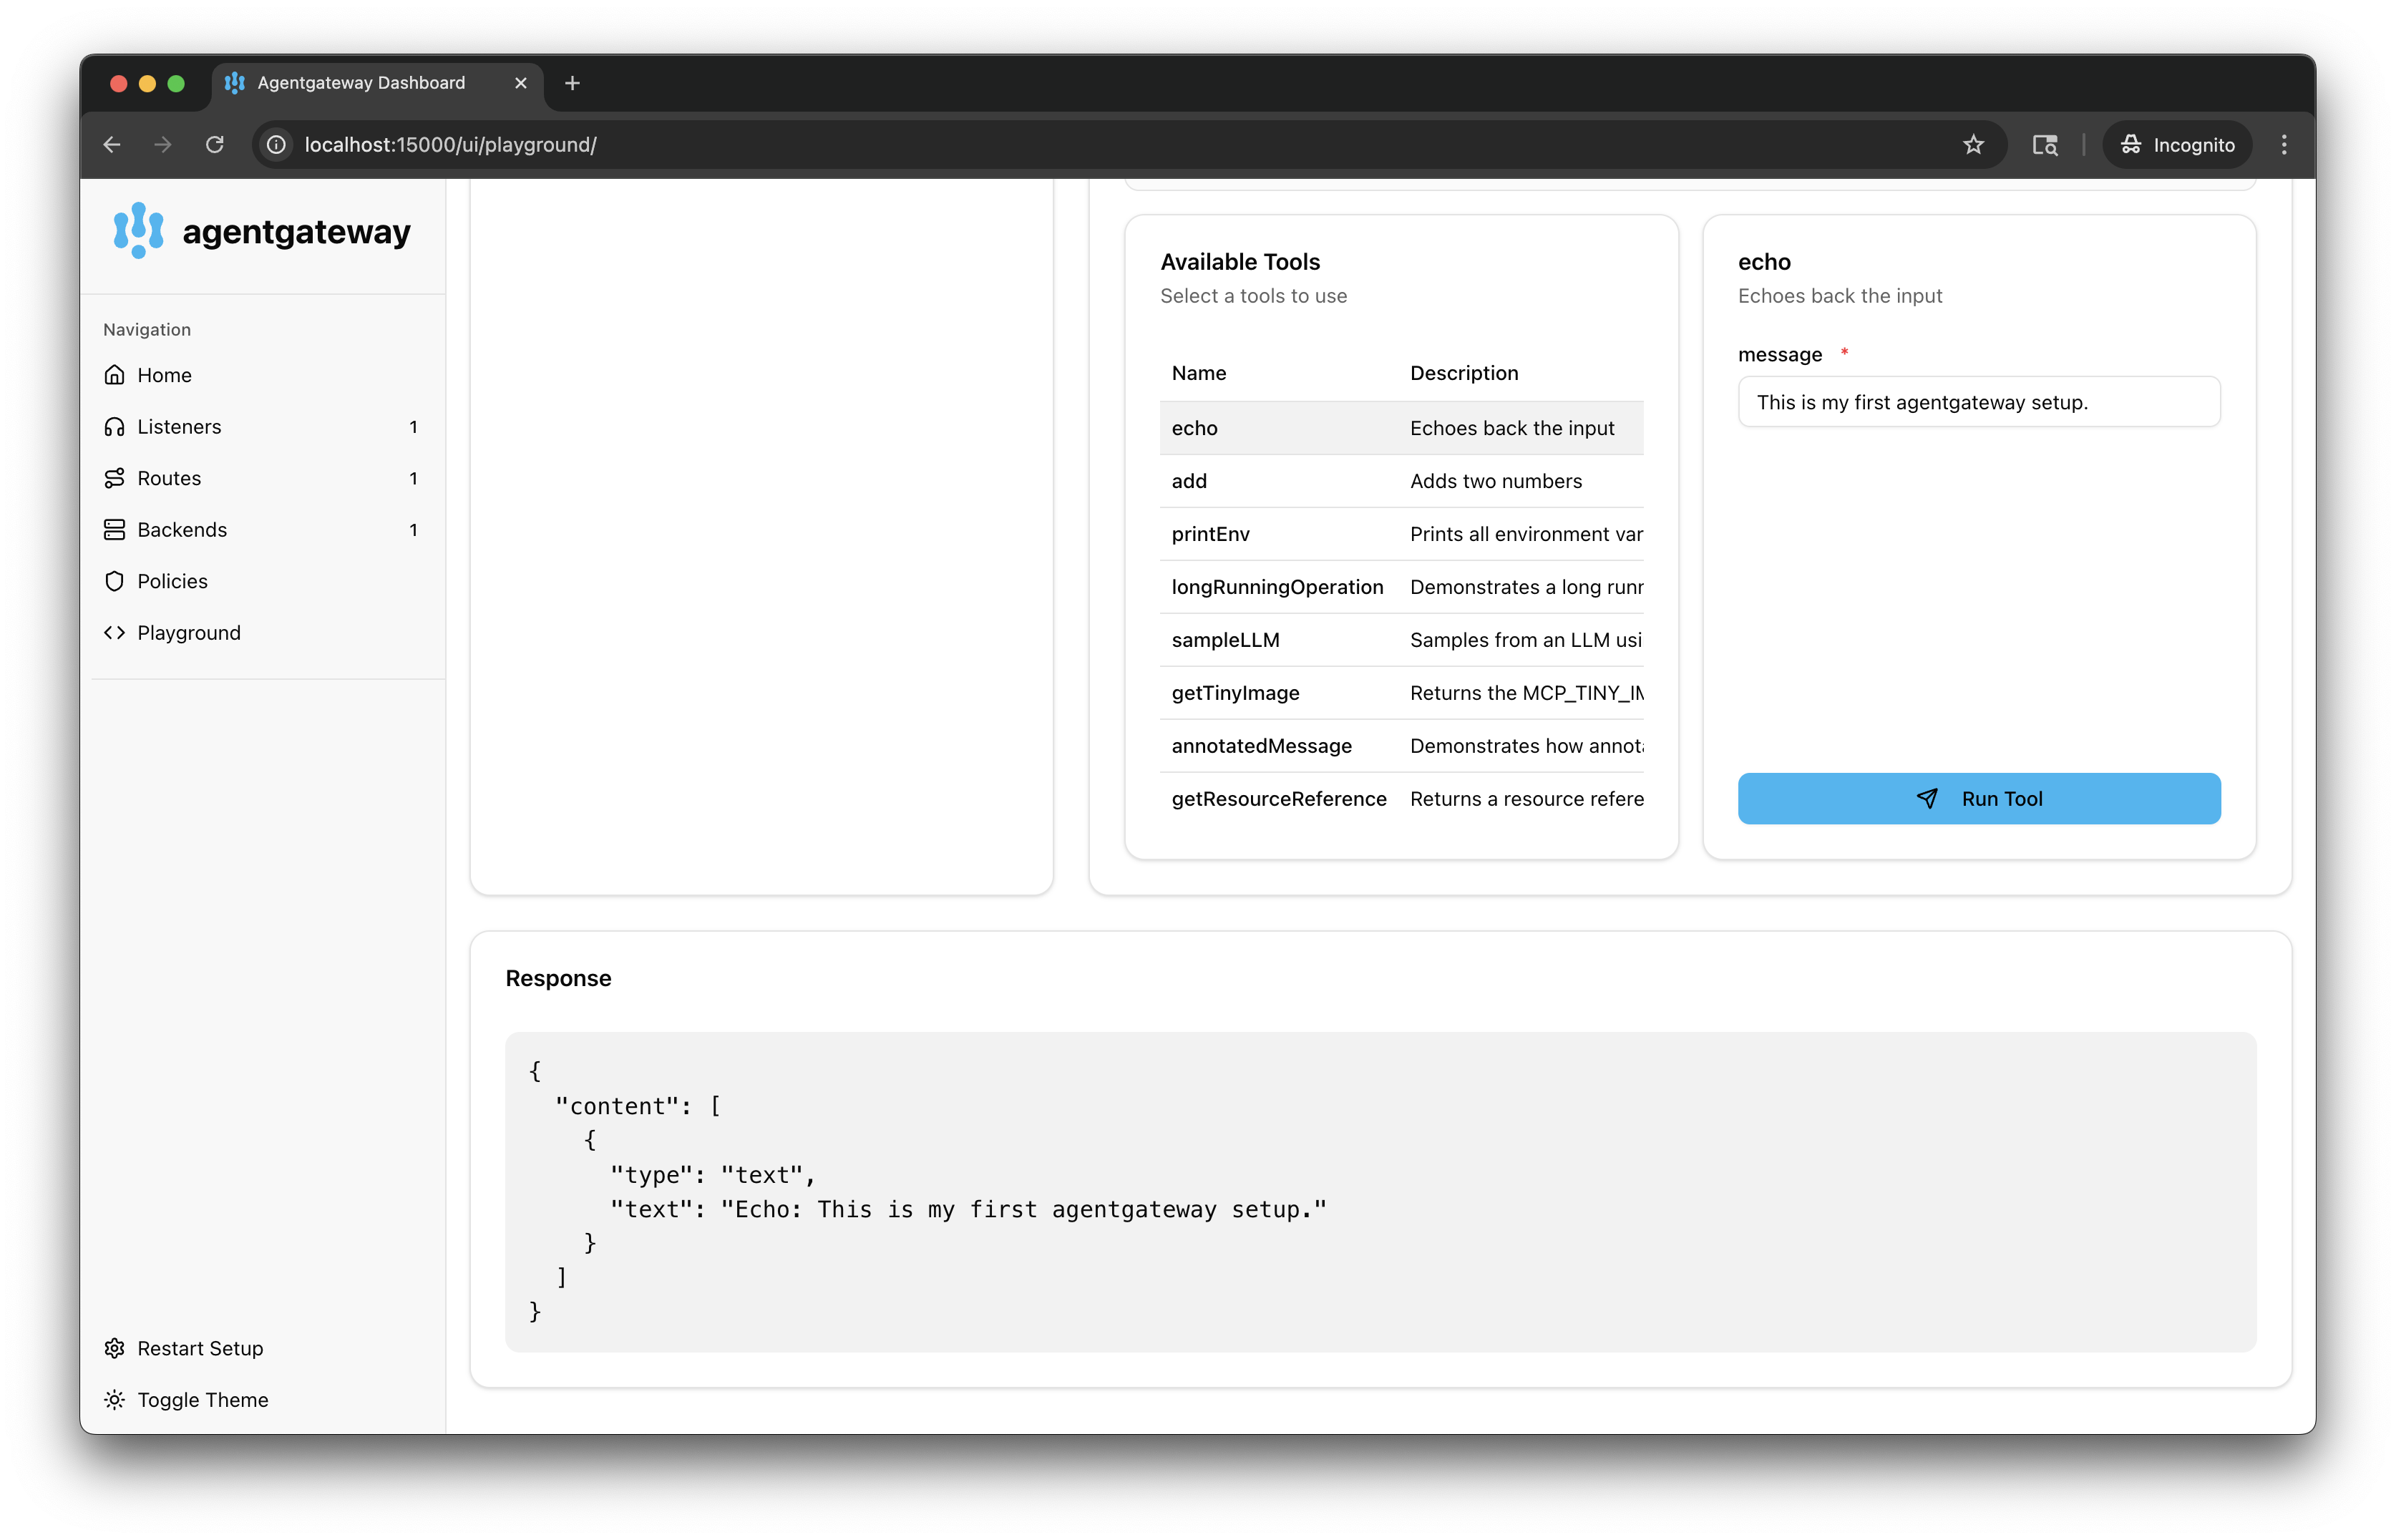
From the Available Tools list, select the
echotool. -
In the message field, enter any string, such as
This is my first agentgateway setup., and click Run Tool. -
Verify that you see your message echoed in the Response card.

-