For the complete documentation index, see llms.txt. Markdown versions of all docs pages are available by appending .md to any docs URL.
Multiplex MCP servers
Combine multiple MCP servers behind a single endpoint
Aggregate tools from multiple MCP servers into a single endpoint.
What you’ll build
In this tutorial, you configure the following.
- Configure agentgateway to multiplex multiple MCP servers
- Combine a time server (Python) and an everything server (Node.js)
- Access all tools through a single unified endpoint
- Test tools with automatic server name prefixing
Before you begin
Step 1: Install agentgateway
curl -sL https://agentgateway.dev/install | bashStep 2: Create the config
cat > config.yaml << 'EOF'
# yaml-language-server: $schema=https://agentgateway.dev/schema/config
binds:
- port: 3000
  listeners:
  - routes:
    - policies:
        cors:
          allowOrigins: ["*"]
          allowHeaders: [mcp-protocol-version, content-type, cache-control]
          exposeHeaders: ["Mcp-Session-Id"]
      backends:
      - mcp:
          targets:
          - name: time
            stdio:
              cmd: uvx
              args: ["mcp-server-time"]
          - name: everything
            stdio:
              cmd: npx
              args: ["@modelcontextprotocol/server-everything"]
EOF
Step 3: Start agentgateway
agentgateway -f config.yamlExample output:
INFO agentgateway: Listening on 0.0.0.0:3000
INFO agentgateway: Admin UI available at http://localhost:15000/ui/
Step 4: View backends in the UI
Go to http://localhost:15000/ui/ and click Backends to see your multiplexed MCP servers.
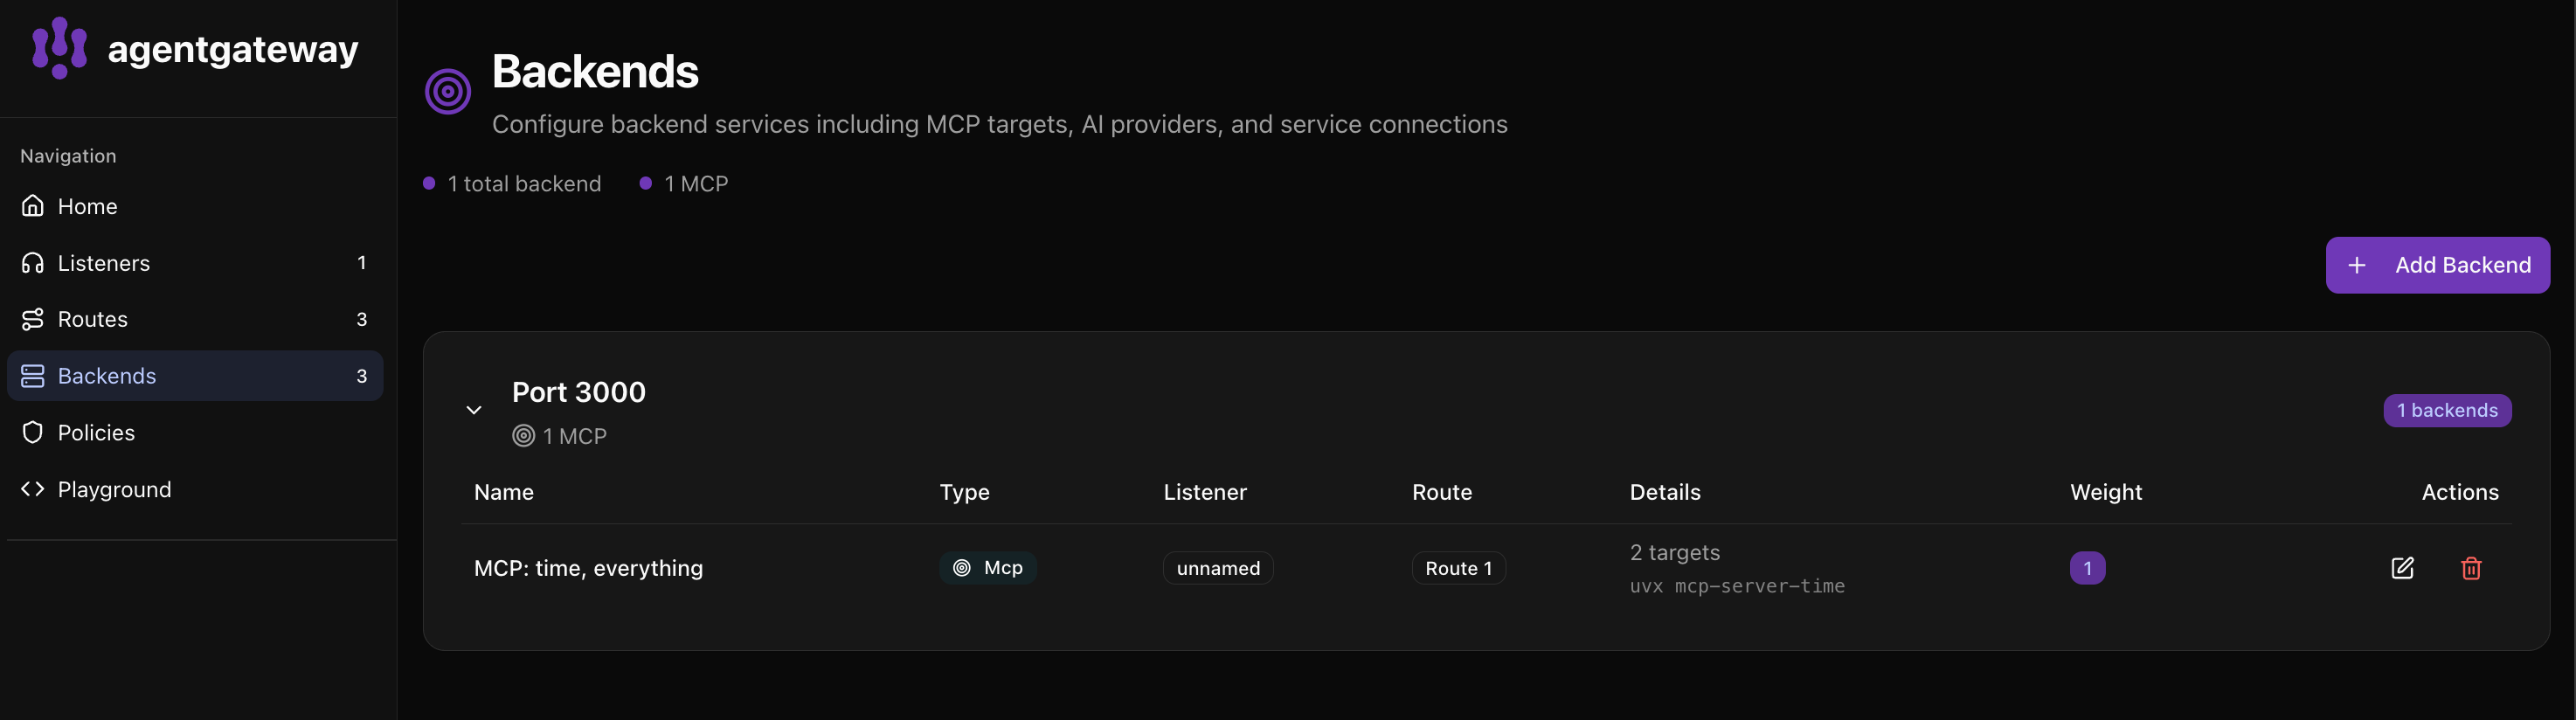
The UI shows:
- 1 total backend with 1 MCP configuration
- MCP: time, everything - Both servers combined into one backend
- 2 targets -
uvx mcp-server-timeand the everything server
Step 5: Test in the Playground
Click Playground to test your multiplexed tools.
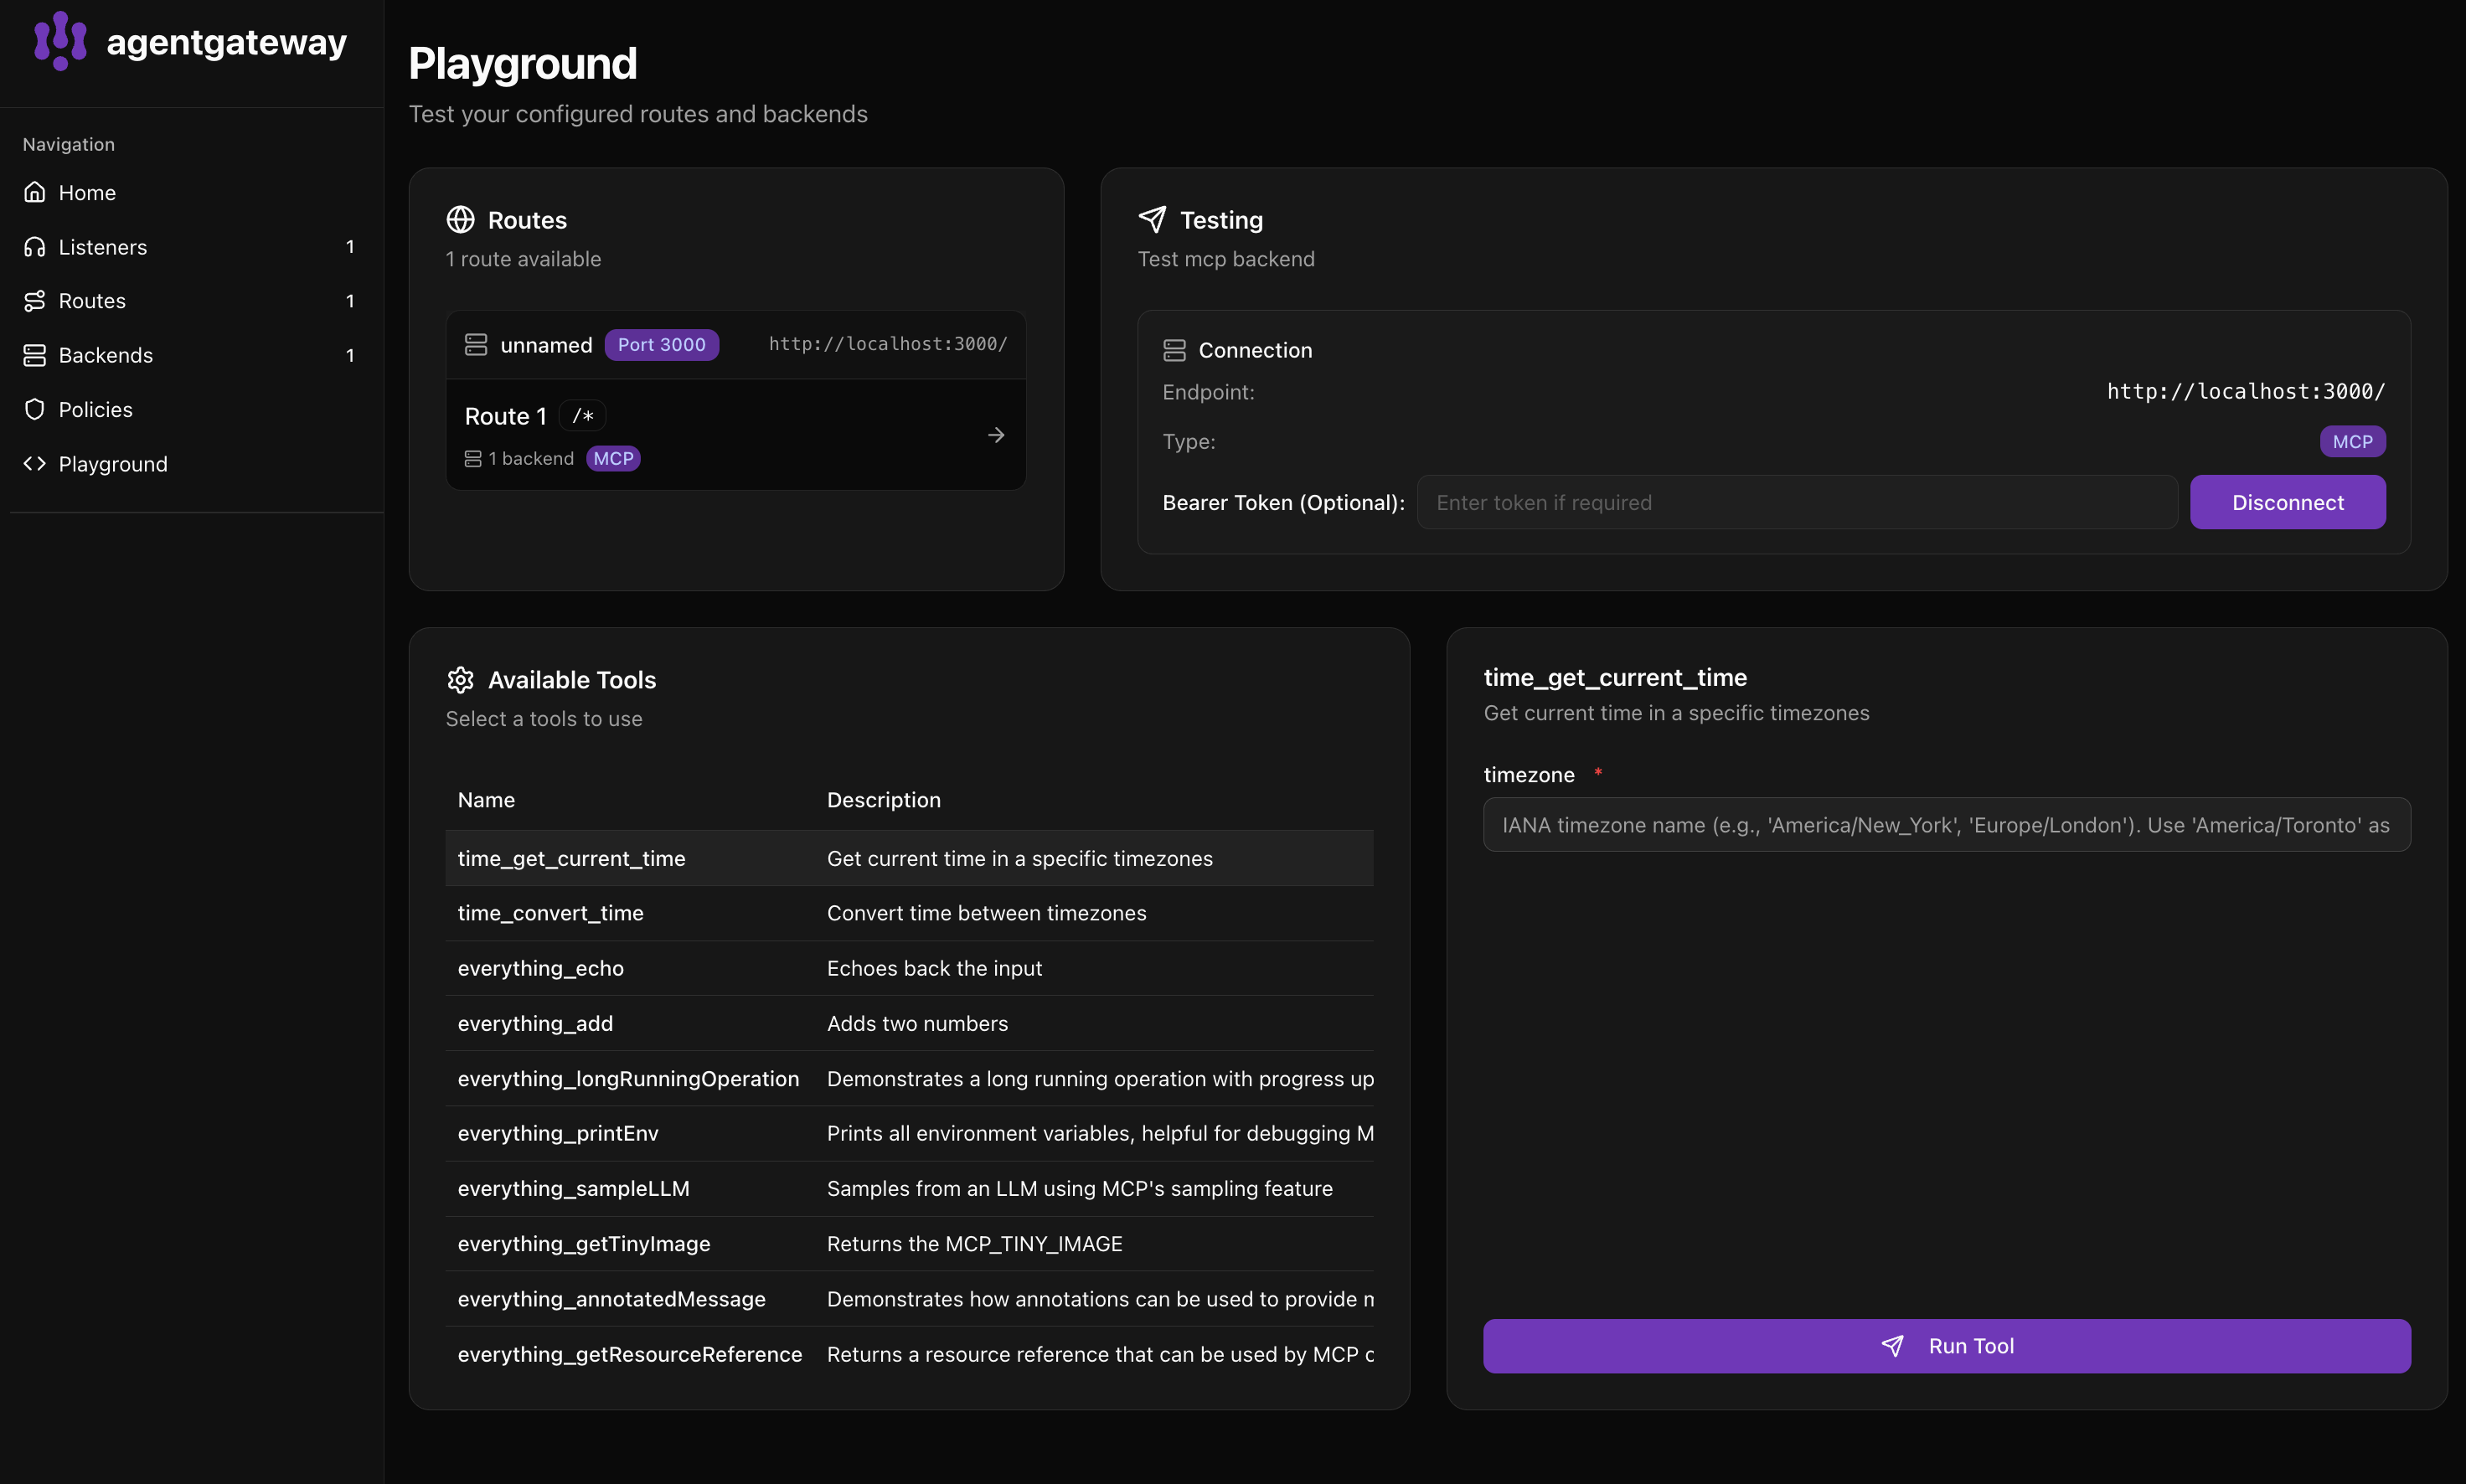
- Select Route 1 in the Routes panel
- Click Connect to discover all tools
- Available Tools shows tools from both servers:
time_get_current_time- Get current time in a specific timezonetime_convert_time- Convert time between timezoneseverything_echo- Echoes back the inputeverything_add- Adds two numbers- And more…
Notice tools are prefixed with their server name (time_ and everything_).
Step 6: Run a tool
- Click on time_get_current_time in the Available Tools list
- Enter a timezone (e.g.,
America/New_York) - Click Run Tool
You’ll see the current time in the response panel.
What’s happening?
Agentgateway federates multiple MCP servers:
┌─────────────────────────────────────────────┐
│              agentgateway                   │
│                 :3000                       │
├─────────────────────────────────────────────┤
│  time_*        →  mcp-server-time           │
│  everything_*  →  server-everything         │
└─────────────────────────────────────────────┘- Tools are automatically prefixed with the target name
- Clients connect to one endpoint and access all tools
- Each backend MCP server runs as a subprocess
Next steps
Was this page helpful?
