For the complete documentation index, see llms.txt. Markdown versions of all docs pages are available by appending .md to any docs URL.
Store config in a database
Store config in a database for an agentgateway standalone Deployment in Kubernetes with Helm.
In this guide, you deploy PostgreSQL, switch the chart to database mode, and verify that configuration that you add in the UI survives a restart.
About
By default, the chart renders your Helm values into a ConfigMap and mounts it read-only at the /config path in your agentgateway pod. The proxy reads that file at startup, and the Helm values remain the source of truth for the configuration.
Read-only storage keeps the deployment reproducible, but it also means that the admin UI cannot save anything. A save returns the following error, because write access to the mounted ConfigMap is denied.
failed to write to file `/config/config.yaml`: Read-only file system (os error 30)To let the UI store configuration, connect a PostgreSQL instance to your agentgateway pod and switch the Helm chart to database mode. Agentgateway then treats the ConfigMap as a baseline and keeps UI-managed resources in the database. When you make updates to these resources via the UI, agentgateway merges the resources from the database with the baseline in the ConfigMap.
Chart modes
Chart mode | Storage mode | Configuration source | UI saves |
|---|---|---|---|
readonly (default) | file | The Helm values that you provide to configure agentgateway. The values are translated and stored in a ConfigMap that is mounted to the agentgateway pod. | Config is read-only. UI updates are rejected. |
database | hybrid | The ConfigMap as a baseline, with an overlay in PostgreSQL. | Updates to resources that are editable via the UI are stored in the database. |
Everything that you put in your Helm values is part of the baseline, including the fields that you can later edit in the UI. In database mode, agentgateway never writes back to the ConfigMap. Instead, it stores your UI edit in the database and layers it over the baseline value when it reads the configuration.
To choose a mode, set the chart’s mode value. Do not set the config.storage.mode or config.database.url fields in your Helm values, because the chart derives both fields from mode and overwrites anything that you set for them.
What the database stores
The database holds only the resource types in the following table. Everything else in the configuration file, such as the config section and the structure of the file itself, comes from your Helm values by way of the ConfigMap.
| Area | Resource types that the database can store |
|---|---|
| LLM | Providers, models, virtual models, API keys, and policies |
| MCP | Targets, policies, and settings |
| Traffic | Gateways, routes, and TCP routes |
| UI | Policies and the model catalog |
Important
Even in database mode, you cannot save the configuration file as a whole in the UI’s configuration editor, because the mounted file itself remains read-only. Treat your Helm values as the source of truth for the file, and the UI as the way to manage the resources that are layered on top of it.
Sections must exist in the ConfigMap
The database stores the resources within a configuration section, but not the section itself. Because adding a section changes the file, and the file is read-only, the UI cannot add a section in database mode. Your Helm values must already include the section, even when the section is empty.
Consider the mcp section. The following Helm values let you add MCP servers in the UI, because the mcp section exists for agentgateway to store targets in.
config:
  mcp:
    targets: []
Without that section, the UI navigation shows only MCP > Get started, and clicking Enable MCP fails with the following error, because enabling the capability requires adding the section to the file. The same is true for LLM and Enable LLM.
File configuration is read-only in hybrid mode. Copy the diff and update the configuration file directly.To manage a capability in the UI, include an empty section for it in your Helm values, as shown in the Storage settings and UI sections tab in the following steps.
Before you begin
- Install the standalone Helm chart.
- Have a PostgreSQL instance available, or deploy one as shown in the following steps.
Deploy PostgreSQL
For a production deployment, use a managed PostgreSQL instance or an operator that handles backups and failover. The following example deploys a single instance for testing.
Warning
This example stores the database on an emptyDir volume, so the data exists only for the lifetime of the PostgreSQL pod. If that pod restarts or is rescheduled, the configuration that you saved in the UI is lost, and agentgateway falls back to the ConfigMap baseline. For anything beyond testing, back the database with a PersistentVolumeClaim, or use a managed PostgreSQL instance.
Create a Secret for the database credentials. The following example creates the
agwuser with apasswordpassword.kubectl create secret generic agentgateway-postgres \ -n agentgateway-system \ --from-literal=POSTGRES_USER=agw \ --from-literal=POSTGRES_PASSWORD='password' \ --from-literal=POSTGRES_DB=agwDeploy PostgreSQL.
kubectl apply -n agentgateway-system -f - <<'EOF'
apiVersion: apps/v1
kind: Deployment
metadata:
  name: postgres
spec:
  replicas: 1
  selector:
    matchLabels:
      app: postgres
  template:
    metadata:
      labels:
        app: postgres
    spec:
      containers:
      - name: postgres
        image: postgres:16-alpine
        envFrom:
        - secretRef:
            name: agentgateway-postgres
        env:
        - name: PGDATA
          value: /var/lib/postgresql/data/pgdata
        ports:
        - containerPort: 5432
        volumeMounts:
        - name: data
          mountPath: /var/lib/postgresql/data
      volumes:
      - name: data
        emptyDir: {}
---
apiVersion: v1
kind: Service
metadata:
  name: postgres
spec:
  selector:
    app: postgres
  ports:
  - port: 5432
    targetPort: 5432
EOF
Verify that PostgreSQL is running.
kubectl rollout status deploy/postgres -n agentgateway-system
Switch to database mode
Set the
modevalue todatabaseand provide the connection URL in your Helm values file. Agentgateway creates the schema that it needs on first startup, so no migration step is required. You can optionally presetllmandmcpsections so that you can edit in the UI later.Switch the release to database mode without changing which capabilities the UI can manage. Use this option when you manage the configuration file in Helm values and use the database only to persist the resources for the sections that you already define.
cat <<'EOF' > values.yaml mode: database database: postgres: url: postgres://agw:[email protected]:5432/agw EOFNote
The chart rejects a
database.postgres.urlvalue that does not begin withpostgres://orpostgresql://, and rejects the value entirely whenmodeisreadonly. The URL is rendered into the ConfigMap, so use a database user with only the privileges that agentgateway needs.Upgrade the release with your values file.
helm upgrade -i agentgateway-standalone \
  oci://cr.agentgateway.dev/charts/agentgateway-standalone \
  --namespace agentgateway-system \
  --version 0.0.0-latest-dev \
  -f values.yaml
Port-forward the admin interface.
kubectl port-forward -n agentgateway-system \
  deploy/agentgateway-standalone 15000:15000
Confirm that agentgateway now runs in hybrid storage mode.
curl -s http://localhost:15000/api/runtime | jq '.ui.configStoreMode'Example output:
"hybrid"
Add configuration in the UI
Now that storage is writable, add an MCP server. The Admin UI and the config resource API write to the same place, so use whichever you prefer.
Note
The Admin UI steps require the mcp section from the Storage settings and UI sections tab in the previous step. For more information, see Sections must exist in the ConfigMap. The API steps work with either set of values, because the API creates the section for you when it stores the first MCP target.
Open the Admin UI in your browser.
In the navigation, click MCP > Servers, then click Add server.
Enter a Server name, such as
persisted-target, keep the Streamable HTTP transport, and enter the URL of your MCP server, such ashttp://example.com/mcp.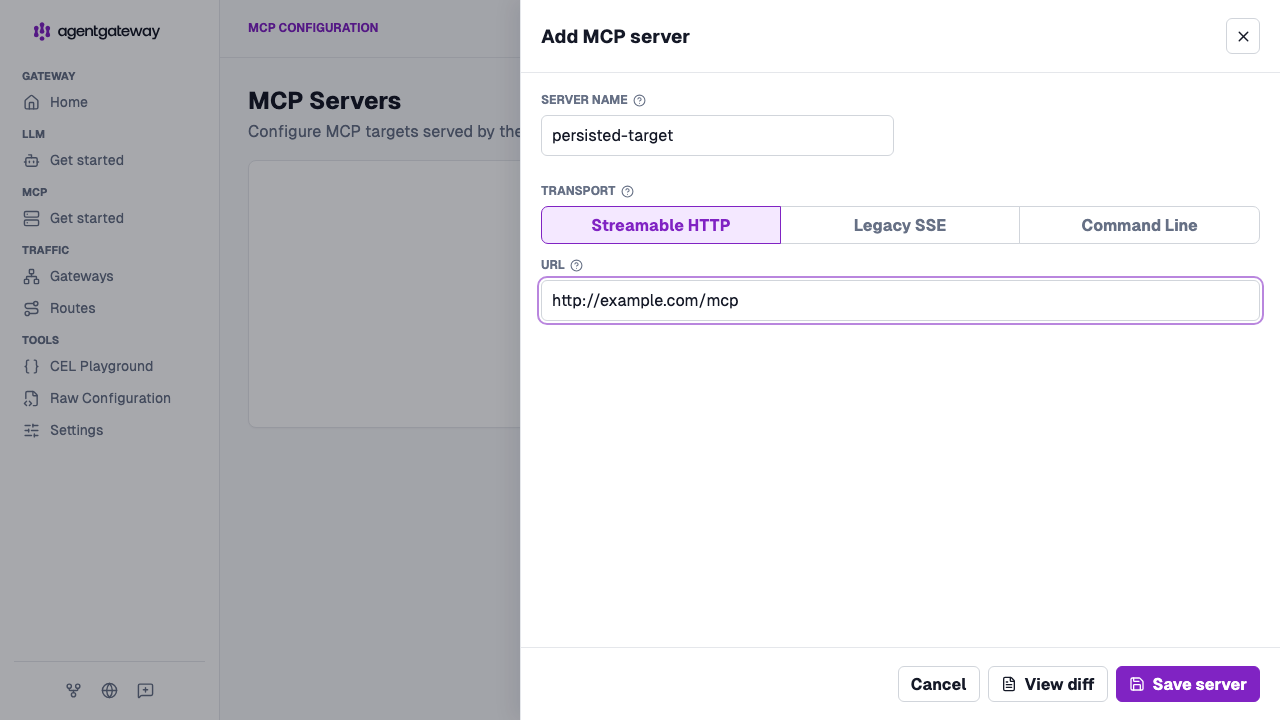
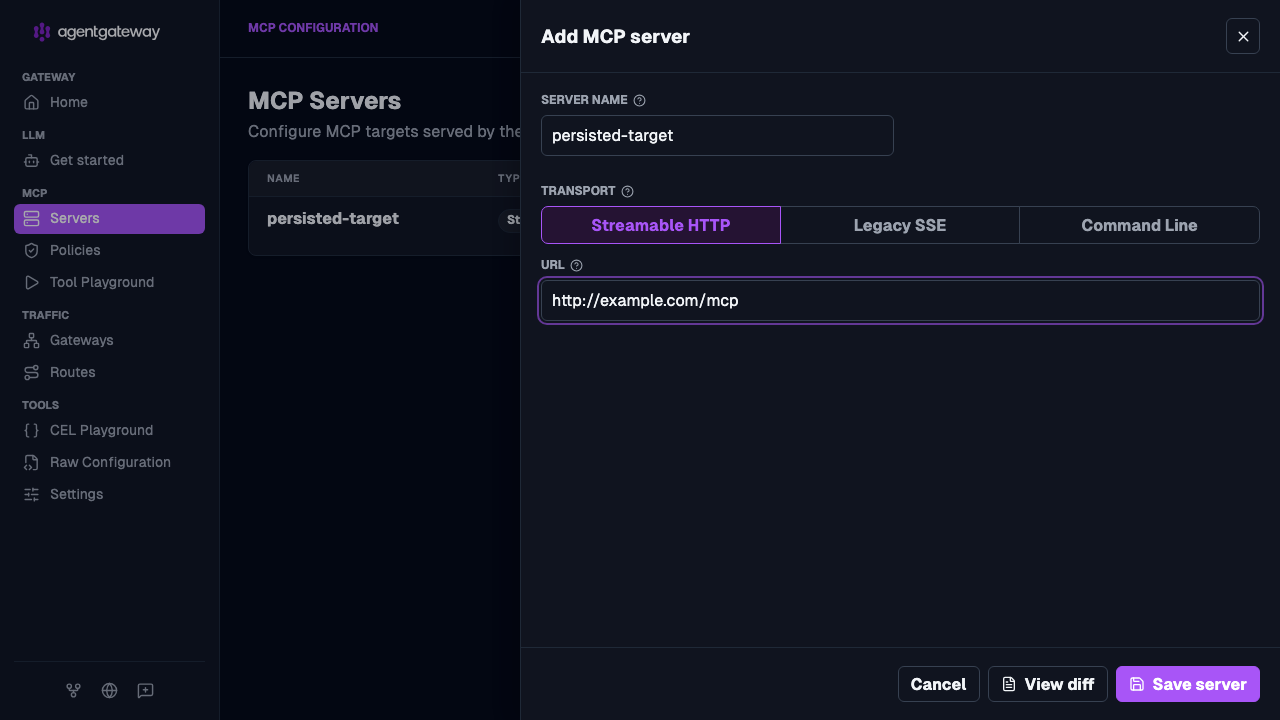
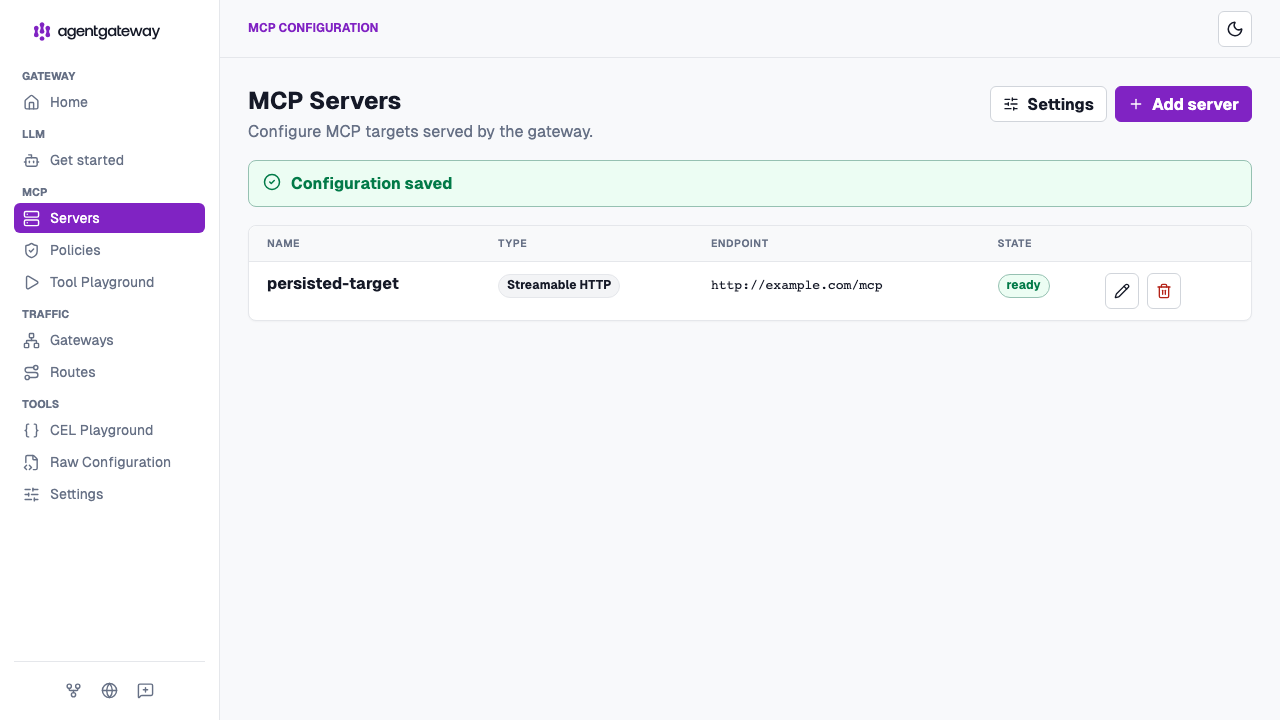
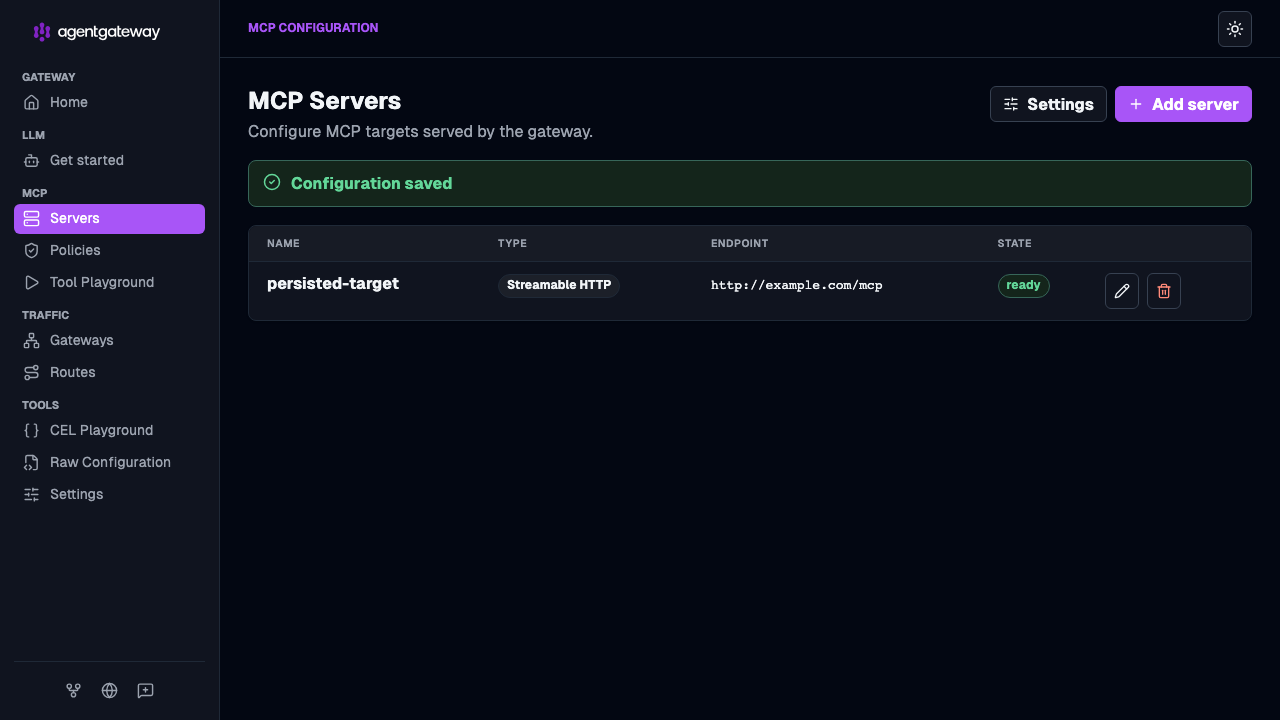
Click Save server. Agentgateway confirms with Configuration saved and lists the server. The save succeeds only because storage is writable. In the default read-only mode, the same action fails.
Verify that configuration persists
Review the effective configuration. Agentgateway merges the database overlay over the ConfigMap baseline, so the server appears alongside the routes that you set in your Helm values.
curl -s http://localhost:15000/api/config/effective | jqExample output: Notice that your MCP server configuration is part of the merged config.
"mcp": {
  "targets": [
    {
      "mcp": {
        "host": "http://example.com/mcp"
      },
      "name": "persisted-target"
    }
  ]
},
Restart the agentgateway pod.
kubectl rollout restart deploy/agentgateway-standalone \
  -n agentgateway-system
kubectl rollout status deploy/agentgateway-standalone \ -n agentgateway-systemPort-forward the admin interface again, then confirm that the server is still available, even after the restart. You can also refresh MCP > Servers in the UI and see it still listed.
kubectl port-forward -n agentgateway-system \
  deploy/agentgateway-standalone 15000:15000
curl -s http://localhost:15000/api/config/resources | jq '.resources[].id'Example output:
"persisted-target"
Scale the deployment
Both storage modes support running more than one agentgateway proxy pod. In readonly mode, every agentgateway pod reads the same ConfigMap. In database mode, every agentgateway pod reads the same overlay from PostgreSQL, so a change that you make in the UI reaches all of them.
Add the
replicaCountvalue to the values file that you created earlier, and set it to the number of agentgateway pods that you want to run. Keep the rest of your values, because the upgrade command passes the whole file and a value that you leave out returns to its default, which would send the release back to read-only storage.replicaCount: 3 mode: database database: postgres: url: postgres://agw:[email protected]:5432/agw config: gateways: default: port: 4000 llm: providers: [] models: [] virtualModels: [] mcp: targets: [] routes: - matches: - path: pathPrefix: / backends: - host: httpbin.httpbin.svc.cluster.local:8000Upgrade the release with your values file.
helm upgrade -i agentgateway-standalone \
  oci://cr.agentgateway.dev/charts/agentgateway-standalone \
  --namespace agentgateway-system \
  --version 0.0.0-latest-dev \
  -f values.yaml
Verify that the deployment scaled to three agentgateway pods.
kubectl get pods -n agentgateway-system \
  -l app.kubernetes.io/name=agentgateway-standalone
Cleanup
You can remove the resources that you created in this guide.Remove the MCP target that you created.
kubectl port-forward -n agentgateway-system \
  deploy/agentgateway-standalone 15000:15000
curl -s -X DELETE http://localhost:15000/api/config/resources/mcp.target/persisted-targetReturn the release to read-only storage.
helm upgrade -i agentgateway-standalone \
  oci://cr.agentgateway.dev/charts/agentgateway-standalone \
  --namespace agentgateway-system \
  --version 0.0.0-latest-dev \
  --set mode=readonly
Delete PostgreSQL and its Secret.
kubectl delete deploy/postgres svc/postgres secret/agentgateway-postgres \
  -n agentgateway-system